Sunday 31 May 2015

Toddler Book Club - session 3 "How to Catch a Star"

I've recently started a "book club" for toddlers in our home (you can read more about how it works here - but the schedule has changed since!) and would love other bloggers to join in - so if you fancy reading the book and then doing a related activity (either what we do or something different), let me know. If you'd like to join in without blogging just leave a comment, or if you blog about it, give me your URL and I'll update the post to include your link :)

Here's a link to our first two sessions:
Elmer by David McKee
The Cat in the Hat by Dr Seuss
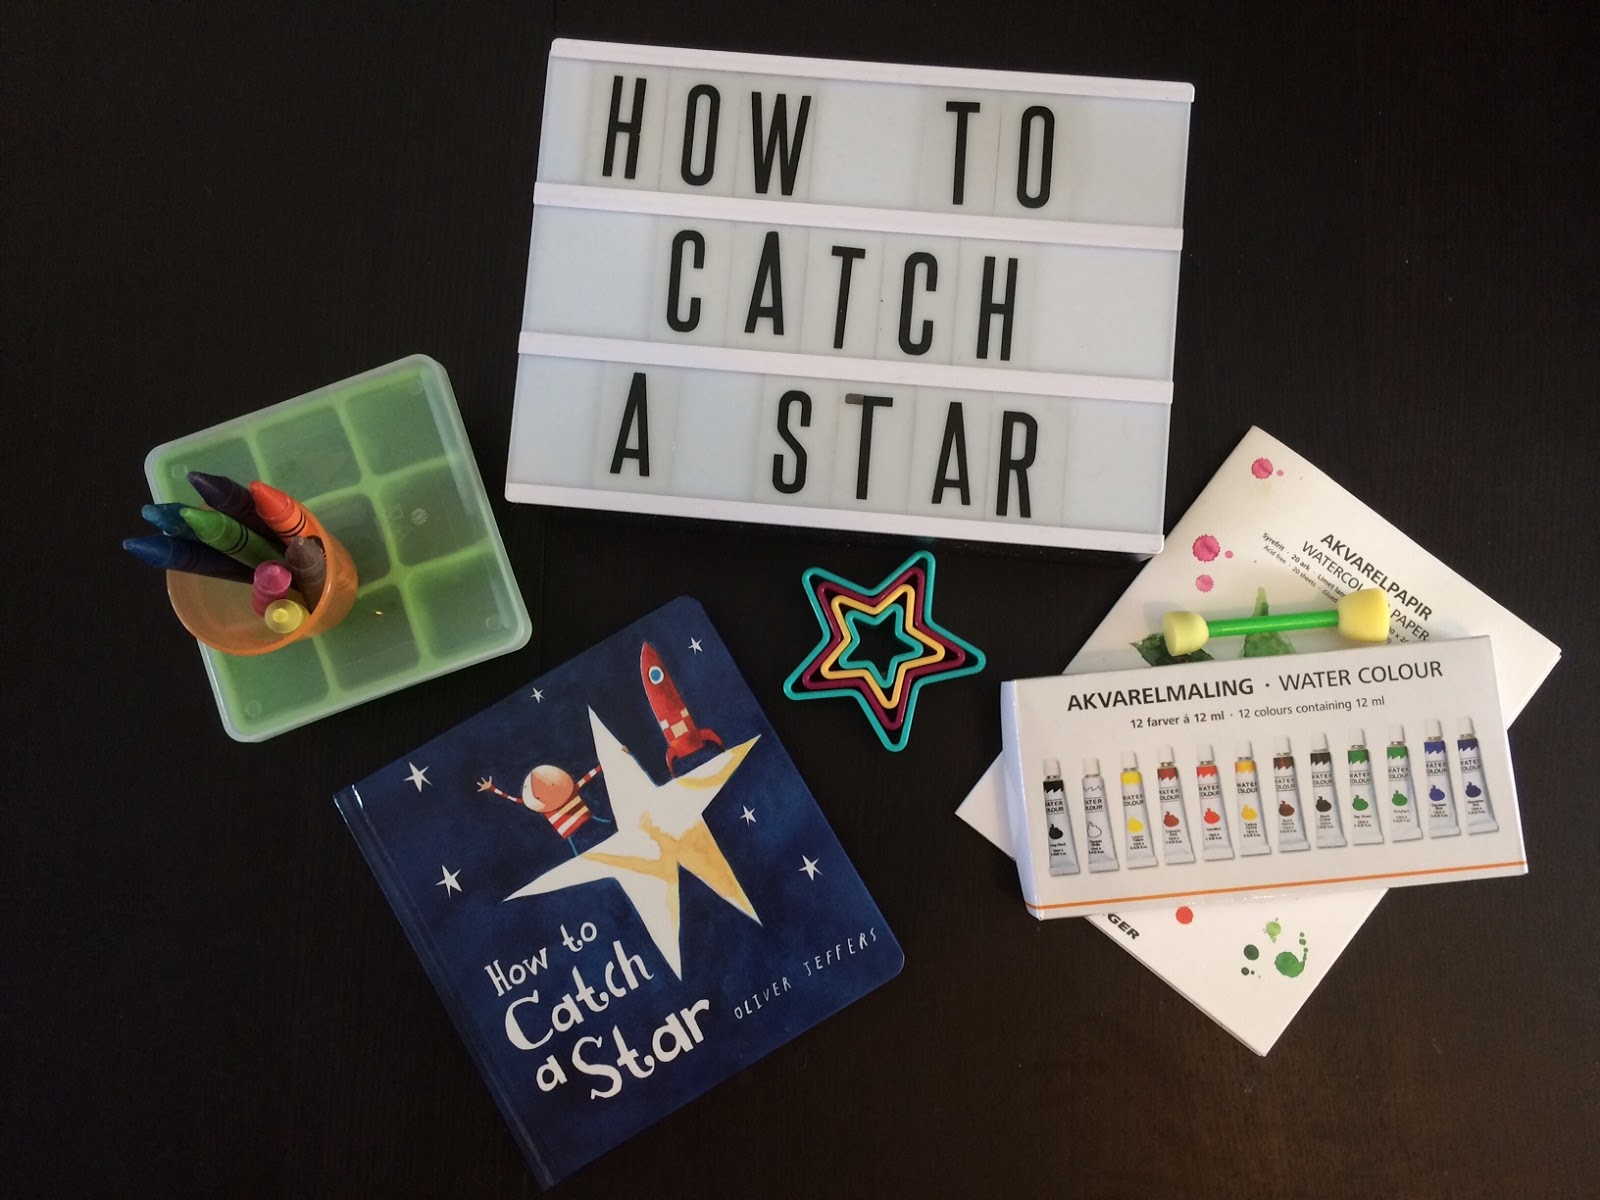
******

HOW TO CATCH A STAR 


It seems an AGE since our last Book club so I'm excited to share this one with you. D was originally given "How to Catch a Star" as a present on his 2nd birthday - it was his first Oliver Jeffers book but we love it. It is about all the ways a boy tries to catch a star so they can become friends.  The story is full of imagination and the illustrations beautifully simple. 

Snack: star shapes
In keeping with the "star" theme we got out a selection of star cookie cutters and icing plungers we have and D got to work. He made some multicoloured sandwiches with wholemeal and white bread. He made some star "stackers" (7 layers of bread and cheese, all in star shapes) and then "star-cored" some apple slices. Not only did he have fun making star shapes, but he made his own tea in the process - perfect!


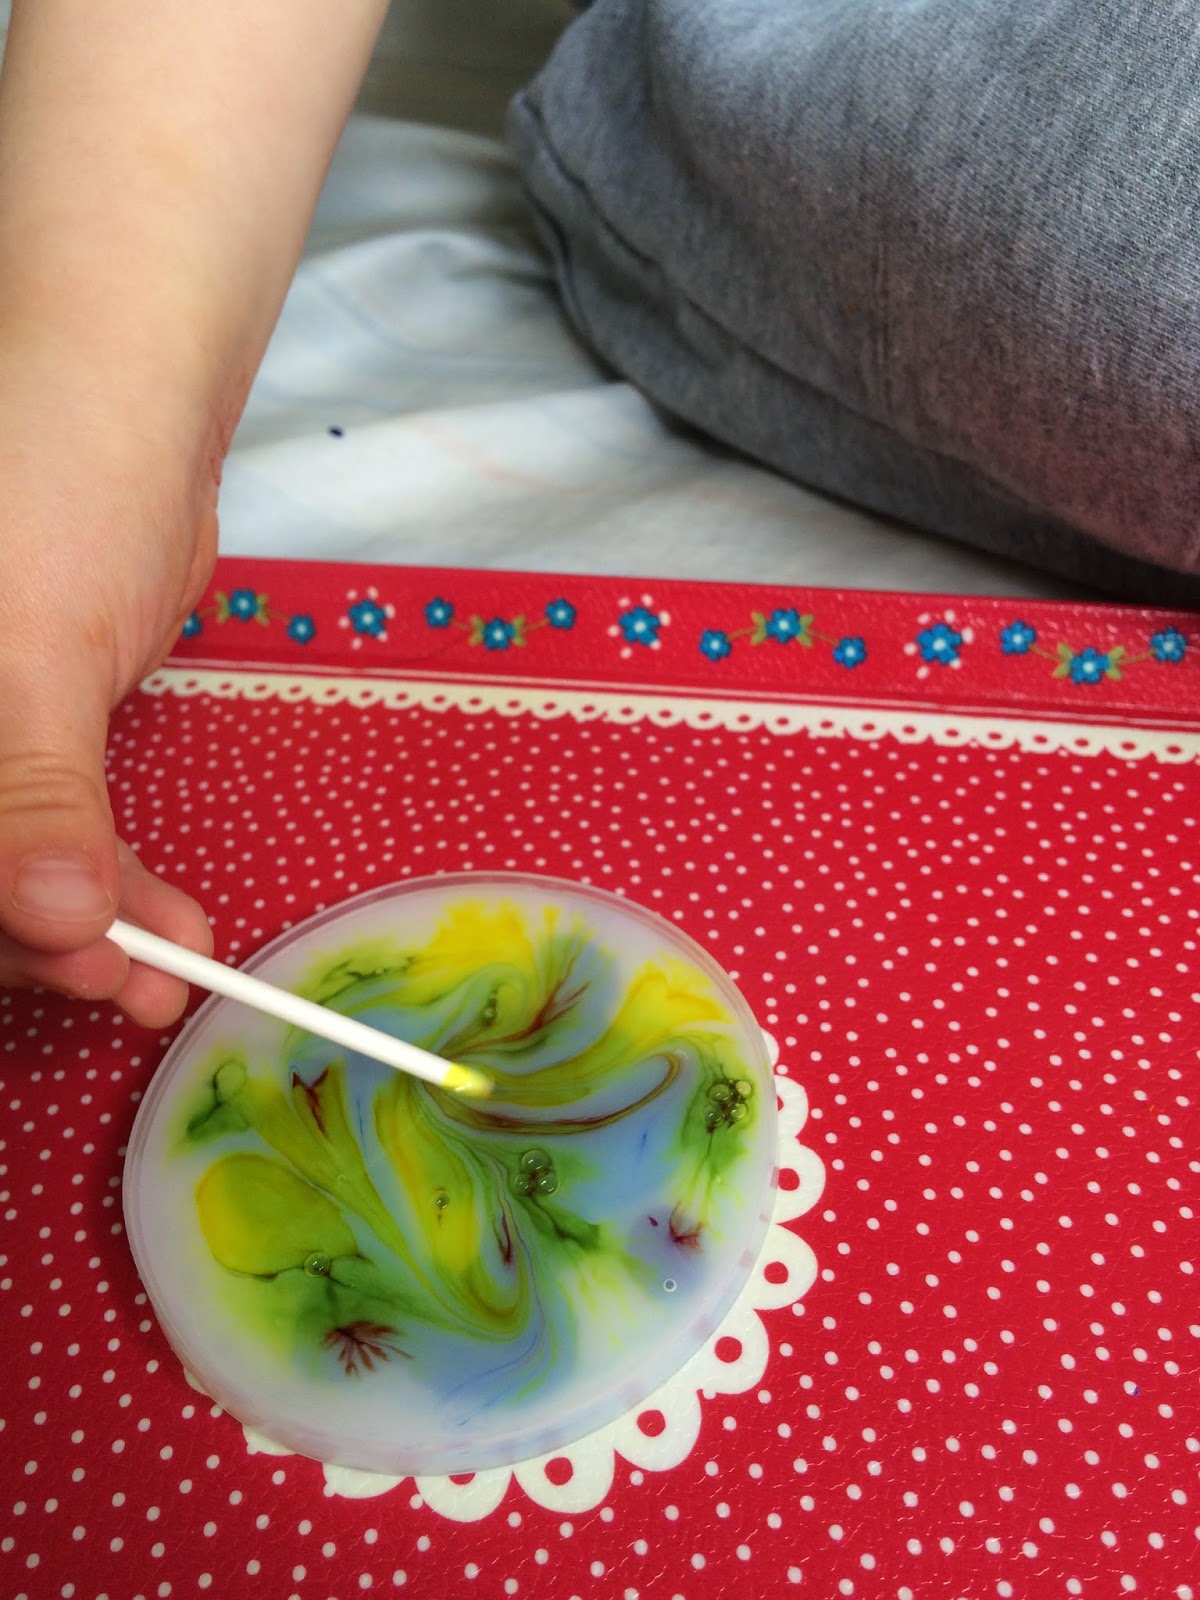
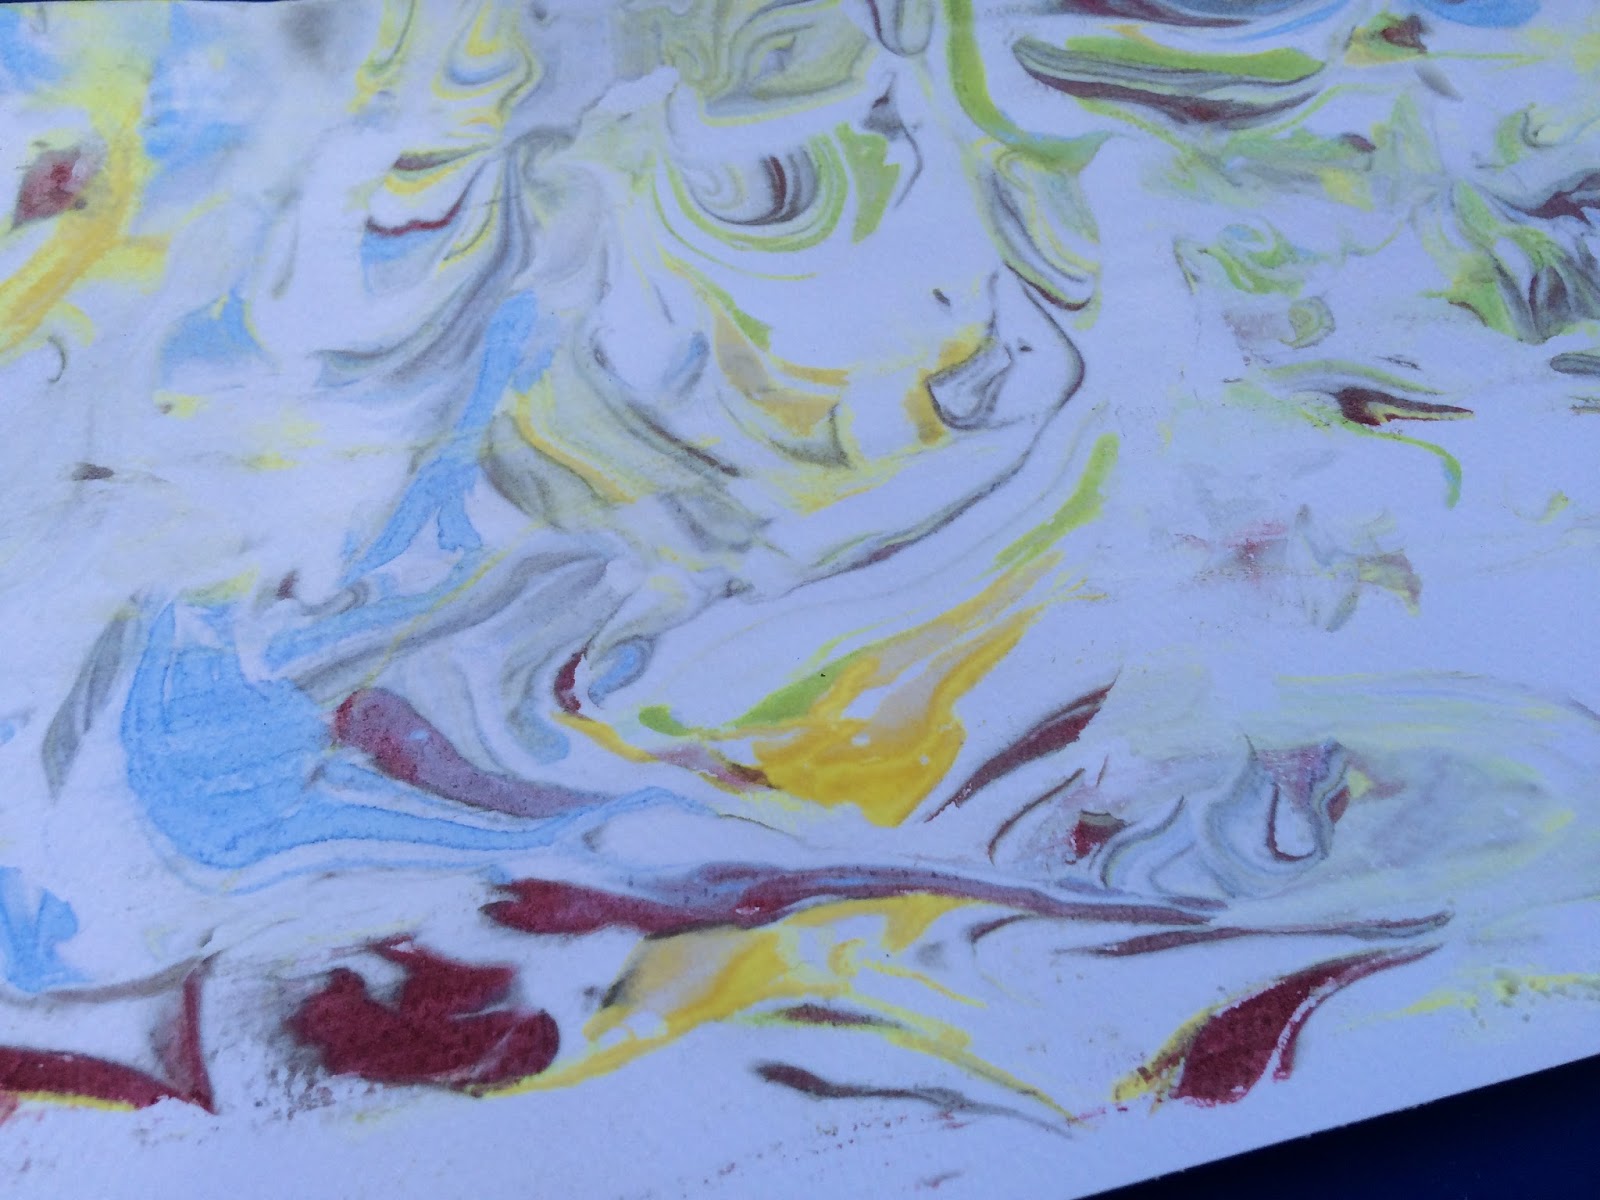
Activity: wax resist watercolour painting
We did some wax resist watercolour pictures, with stars/the sky as our theme. I used a wax crayon to draw some stars and squiggles on a sheet of watercolour paper and D drew his own picture on another page. He then painted over both pictures with various coloured watercolours. It's such a fun way of painting and D loves watching how the paint "runs away" from the crayon marks. Initially I envisioned him using a dark blue colour to represent the sky but I gave him a few different colour options and  (as you can see!) he much preferred the red option! :)


How did it work?

This book club was slightly different as due to a chickenpox scare (Iz was exposed and in that very annoying no-spots-yet-but-could-still-be-contagious phase) the other toddlers didn't come as both had little siblings and big holiday trips approaching. So it was just D, Iz and myself. But we had lots of fun reading the book and D loved making his own tea (and being in charge of all 9 paint colours! Lol).

******

At our next book club we're reading "Paddington". If you've done any star-related activities I'd love to hear below. Or if you're planning to join in next time it'd also be great to hear from you :)


Thursday 28 May 2015

Foam marbling

This is one of my most favourite activities to date - I love it!! And have even done a few pictures of my own after D is in bed ;)


Seriously, how pretty is that?!

So what do you need?
- shaving foam
- food colouring or liquid watercolours
- something to "swish" with (eg craft stick, spoon, finger)
- watercolour paper
- ruler or Squeezee 

How to do it:

Squeeze some foam out onto a flat surface (we did it inside one of our sensory bins) and roughly flatten it off. Add a few drops of different colours (D loves doing this bit)
 
Use your "swisher" to swirl the colours into the foam

Proudly show off your pattern

Even the scrapey-stick looks pretty!

Gently press your paper on top of the foam. Make sure all areas come into contact with the foam
 
Leave for one minute and then carefully lift the paper up (it will be covered in foam - don't worry!)


Using a ruler/Squeezee, expel all the foam off to one side - we used craft sticks but they were too small really. But you can see the cool pattern being exposed as we removed the foam above :) 

Admire your amazing masterpiece
Aren't they just so pretty?

Even just looking at foam is lovely...


Tips

Make sure the ruler (or whatever you're using to remove the foam) is larger than the piece of foamy paper. If you have to make 2 passes (or more) to clear the foam you will get extra streaky marks on your paper that aren't quite as pretty...

We personally found the colours obtained with the food colouring were much more vibrant than with the watercolours. It might be because the watercolours were more dilute (I'd make them more concentrated next time) but is something to bear in mind.

You can see the difference here - watercolour ones top left and food colouring ones bottom right
******

Afterwards we used the rainbow foam for small world play with some of D's animals - he gave them all a rainbow bath and then washed them all afterwards. It lent an extra 20 minutes of playtime to the pretty foam and was nice to use it for a couple of different things :)


******

These pictures would make lovely homemade cards or present tags - perfect for that next present for the grandparents.

Have you done marbling with shaving foam? I'd love to hear about it :)


Wednesday 27 May 2015

Story stones


D has a fascination with collecting sticks and stones at the moment. After initially trying to discourage his mounting collection I decided I may aswell embrace it and so his story stones were born...

These are very easy to make and I love how portable they are - perfect for slipping in your handbag on a day out. There are a few different ways to use story stones - at the moment we use them as story prompts (so D will "act out" a story based around the stones) but when he's a little older we can try other things - like picking a stone at random and then free-styling a story, until another stone gets added in etc.

At the moment he has 3 main "groups" - Frozen, Peppa and Mr Menv-themed. I love listening to his stories - so far we've had Peppa eating ice-cream with Anna, George swimming with Elsa and Olaf building a sandcastle with Mr Tickle. Story stones are a brilliant way to engage their imagination, whilst getting them to practice language skills without them even realising :)


So if you'd like to make some of your own all you need are:
- some stones
- stickers or images cut out from magazine (or printed off from computer)
- modge podge (or watered down PVA glue)

Choose which image fits best on which stone (this was also a good opportunity to teach D the difference between rough irregularly shaped stones and smooth flat pebbles). Then either stick it directly on the stone if it's a sticker (e.g. our Frozen ones), or stick it on with a layer of the MP/glue if just an image (e.g. the Mr Men ones). Then cover the whole surface with a layer of MP/glue and allow to dry.

That's it.

So simple! But a perfect take-anywhere toy that you can keep adding to whenever you find the right size/shape stones :)

Sunday 24 May 2015

Battle of the babies: top 10


Nature vs nurture? Here's a follow up to my original "A tale of two babies" post - how are they comparing now and who comes out on top?

Weaning
Omnomnomnom

Initially I thought this was going to be a Doofy win as he was a champ and within 3 weeks of starting weaning at 4+ months already had a more varied diet than us! Iz was definitely slower accepting the spoon but has always been happy to feed herself, and with SO much gusto, that I think this has to be a draw. 
Verdict: draw

Breastfeeding

Right from labour ward Iz was always going to win this one! Although winning this one means she does lose at another later category...
Verdict: Iz win by clear margin!

Teething

Oh how I long for the days of D teething again. A little bit of dentinox, very occasionally some nurofen, and he was as happy as Larry. Iz on the other hand... not so easily placated or satisfied!!
Verdict: Doofy win

Sleeping

Sssshhhh sleeping!
I don't even know where to start with this one! You can read about D's sleeplessness herehere and here. I've been too sleep-deprived to blog about Iz's! Lol. At the moment she's going through a "let's wake up for the day at 4am" phase. Not sure if I prefer it to her "let's feed for 2 hours solid at 2am" stage or her "let's wake up every 30 minutes throughout the night" stage... Hmmm I wonder what will be next?!
Verdict: draw - they're both as bad as each other but in different ways!

Healthiness

This is a tricky one. Iz definitely has way more coughs/colds/temperatures than D did (poor younger sibling!!) but D had already had 2 hospital stays by 9 months.
Verdict: undetermined

Nursery settling

Nursery settling was hard with D. It was the first time for both of us and he hated it initially. Now he absolutely loves going though :) Iz on the other hand seemed to take to it like a duck to water. Few tears during the first 2 sessions and just happy giggles since.
Verdict: Iz win

Transition to formula

Tied in with the breastfeeding above - I think Iz's love of boob hindered her here as she was very reluctant to swap nice cosy snugly breastfeeds for a plastic tommee tippee cup! We're getting there slowly (it's only taken 3 months!).
Verdict: Doofy win

Crawling

D took his time building up to crawling. A few days of planking followed by bottom in the air followed by attempts at commando crawling etc etc until eventually a "proper" crawl occurred. Iz just woke up one day, did a plank and then crawled in the afternoon. Not sure if it was to keep up with D or to escape from him tbh!
Verdict: Iz win

Car journeys
Don't be fooled - D did not do this often...

Living in London we don't do loads of car journeys but everyone says babies get lulled to sleep in the car so we thought it was a great plan to book a driving holiday from Vegas to LA when D was 5 months old... Fast forward to lunchtime on the first driving day - after nonstop screaming from Vegas to the Hoover Dam (and beyond!) we realised D was *not* a car fan! He's now ok as we've hooked up a DVD player in the back but Iz has always been ok, ever since a baby. Phew.
Verdict: Iz win

Mummy love

Yes I know it's a complete stereotype but for my two it's definitely true. D is a real mummy's boy (and gives the best cuddles!) whilst Iz is a proper Daddy's girl (her arms flap so fast when he walks in the room she looks like she might take off!!).
Verdict: Doofy win

******

So there it is. Some they win, some they lose. Overall (luckily) their positive sides outweigh any not-quite-so-perfect parts ;)

What about your kids? If you have more than one how would they fare in a "Battle of the babies"?


Saturday 23 May 2015

Hand/Footprint art

I LOVE anything that involves hand/footprints - I'm a complete sucker for those little chubby hands and cute squidgy fingers :)

I've been meaning to post this for a while but then we kept doing more art using hands/feet/fingers... Anyway here is the lowdown on what we've done so far:

Pottery
These were the first things I did with D when he was little. We went to a pottery cafe and they helped me do his prints. I got a bit carried away and made about 5 plates but they were perfect presents for grandparents (and mementos for us!) :)
 
Look how tiny his hand is compared to mine!

Reindeer/santa cards
These were from D's first Christmas - I think they turned out pretty well as I did them by myself with him (getting handprints especially is always easier with someone else helping!! Lol)


Christmas tree cards
Iz's first Christmas card - I tried several arrangements of the sticker "baubles" and definitely preferred the random arrangement. You can read more about how we made them (and the tinsel one below) here.


Tinsel canvas
I love this - the top string is made up of Iz's thumb prints (it was way too difficult to try and get fingerprints from her!) and the bottom line is D's fingerprints. He had great fun doing this as he loved choosing which colour was coming next and doing a random pattern of dots. I think it's really cute having their different sizes side-by-side.


Butterfly prints
The top ones were from Iz's feet when she was 4 weeks old. I used a rainbow stamp pad, inked her feet and them stamped them on some plain paper. Once they were dry I then cut them out and made cards. The bottom picture is from D and he had lots of fun helping me paint his foot with lots of different colours and then standing on the canvas. The antennae are thumbprints :)


Heart thumbprints
We made these with Iz and D just before Valentine's day this year - you can read the full post here.
 

Flower card


Foot Magnets 
We made these using the same rainbow ink pad as above but stamped the impressions onto a magnetic sheet. Once dry I just cut out the footprints, annotated them and put them on the fridge :)


Thing 1 & 2 prints


Sibling hand casts
I think this is my favourite handprint make we've done to date. Just too cute. You can read about how we made it here - very easy and a lovely way to preserve just how small their hands were forever.


Easter cards
D made these this year. Just his thumbprints in stamping ink and then accessorised by me (more detailed post here). When he's older he'll be able to do that bit himself - can't wait to see what he creates :)


Our next projects include ghosts and fish :)

******

Have you done any footprint or handprint art with your kids? What have been your favourites?

Sunday 17 May 2015

Swimming tips for little ones


Recently we were lucky enough to be sent a "Swim Fin" to use and review. If you've never heard of them this is what one is:
A boy shark!

Developed by a swimming teacher, you wear it on your back instead of armbands/buoyancy suit and it keeps your body in a more horizontal (and much more 'natural' position) when swimming. And it makes you look like a shark - AMAZING!

Shark attack!!

So far we've had lots of fun wearing it around the house (yes, it will even fit an adult!) and the 8 year old insisted on wearing it all through lunch one day... Even Iz got in on the action :)

Baby shark :)

Next week we're taking it to our local swimming pool (I haven't felt brave enough to take both D and Iz on my own yet so we're having to wait til OH has a day off) and so will post a review of it "in action" then. In the meantime here are some of my top swimming tips that might be useful for anyone wondering how to start swimming with their little ones:

1. Start young
Both of mine started lessons at 6 weeks and we've never had any problems with being scared of water/not wanting to go etc. It was also a lovely sociable activity for me to go to, meet other mums and get out of the house even on my most knackered days. It's incredible when you look back and realise your tiny 2 month old who couldn't reach for an object or even acknowledge the ball during playtime is now a 6 month old who is happy to swim underwater, will make a valiant effort to hold on to the side without your help and laughs hysterically with glee whenever the ball comes out to play :)

2. Make it fun
Everyone develops at their own pace and the most important thing is to keep it fun. There's no point in pushing your baby if they're teething or have a stinking cold (and a screaming baby's screams are *even* louder when echoing round a pool!!) so keep it fun. Most swimming classes incorporate nursery rhymes into different activities (eg Humpty Dumpty when they fall in from the side) which is also easy to do when you're swimming on your own with them. And there are loads of fun things you can do in the water - D's favourite is "Jelly on a plate" when he sits on a mat and we wobble it until he falls in :)

3. Use bath time as an extension
There are lots of things you can do in the bath which help prepare babies for getting in the pool. From "showering" them with water over their head (getting them used to water over their face and letting them practice closing their eyes/holding their breath) to blowing bubbles (laying foundation for effective breathing techniques as they get older), the bath is a great place to cement any new skills they're working on.

4. Be confident
Even if you're not the most confident swimmer don't let your fear show. Obviously stay in the shallow end and work within your limits but let your kids see that swimming is fun and not scary.

5. Be organised
The first time I took D swimming he was 6 weeks old and I think it took me (no exaggeration!) 30 minutes to get us both ready for swimming! But now I can get us both undressed and dressed in under 5 minutes, whilst also wrestling a baby :) make sure you always take 2 swim nappies (in case of a just-before-you-get-in-the-pool poop) and don't forget a regular nappy for after. We like to use hooded towels for swimming as you can wrap them up super snug, including their wet hair, even if the changing rooms are drafty. Don't forget to also take a plastic bag to put your wet things in. And a snack and a drink for afterwards will usually buy you a few minutes peace to get changed yourself - swimming is be pretty energetic and tiring for little ones, even if it doesn't look like they've done much!

******

I also asked Laura Sevenus (an ex-competitive swimmer in South Africa, author of “Practically Swimming” and founder of the Sevenus Swimming School in London) how do you know when your baby is ready to start swimming lessons. Here are her top tips:
  • Each child will have his or her own individual personality and sensory thresh hold so don’t push too much or too soon. Babies require time, nurturing and gentleness in order to flourish and learn.
  • There is no rush.  Whether your baby starts swimming lessons at 3 or 6 months, it will make no difference to their ability to swim independently at 2-3 years old. 
  • Bonding is the result of true communication between parent and baby.  Your baby will let you know how he/she is feeling with body language. Learn to read your baby’s signs and then respond to what is being conveyed.
  • If the water feels cool to you, your baby will feel the same but just may not be able to tell you. Heat is lost through your baby’s head therefore it is not a good idea to submerge your baby’s head if the water temperature is on the cool side.
  • If parents have missed the opportunity to take their children swimming as babies, 4 years is a good age to begin lessons. A child will have more understanding then and will take instruction readily. They will have learnt to reason by this stage and are generally keen to attempt anything. If left longer than this age, he or she may start becoming self-conscious of the fact they are unable to swim and then more psychology will have to be employed.
  • Parents can do so much in building water confidence by allowing their children to play in the bath under supervision. Babies love to be floated in a deep bath of water. Toddlers love sitting and play water pouring with containers. Make bath time fun and without rushing – but of course always with adult supervision!

Laura is currently based in London where she runs the Baby Spa (which we loved when D and Iz were younger - you can read why here). Babies as young as 2 days swim there and after a few months when they are ready they can move on to more formal swimming lessons at the Laura Sevenus Swimming school.

******

Do you swim with your little ones? Do you have any other top tips for parents? Add them below if you do - I'd love to share them :)

Saturday 16 May 2015

What Iz loved - April 2015

Here is what Iz loved this month:


4. Crawling!
5. Having proper teeth :)
6. Her giant water bead waterbed
7. Getting messy
8. Giant bubbles!!!

******


Glue suncatchers

This is a super simple activity that takes no time to set up (and gives you the excuse to eat lots of Pringles!).


What you need:
 
- Glue that will dry clear (we used PVA)
- food colourings
- a cake pop stick (you can see here the reasons why I prefer them to other options but you could also use a cocktail stick)
- a plastic lid (the ones from Pringles cartons are perfect)

Instructions:
 
1. Pour a thick layer of glue into the lid
2. Add a few drops of food colouring to the glue
3. Using your cake pop stick, gently swirl the colours (some restraint is needed - see tips below!!)
4. Leave to set on a flat surface (can take 3-4 days to fully dry)
5. Once the edges start peeling away from the lid gently peel the circle out
6. Trim the sides if needed and use a hole punch to make a single hole if doing a hanging suncatcher, or two holes of making bunting
7. Add some ribbon and display :)


Tips:

Pour as thick a layer of glue as can be contained within the lid - this will make your suncatcher more sturdy.

Remember to shake your glue bottle first! I forgot the first time and so ended up with a few suncatchers that never properly dried because they only contained the thin clear portion of the separated glue :(

This is definitely one of the times when less is more... Only use a few drops of food colouring and don't go crazy with the stirring - otherwise you'll end up with a brown mess! The colours will contain to spread out after you stop mixing them so be prepared for your patterns to change. I bought some tiny 5ml dropper bottles on Amazon which are perfect for activities like this - I filled each with a different colour and then let D be in charge of the squeezing (great pincer grip practice) without any fear of food colouring going everywhere!!
 
This was the first batch we made - you can see already how dark 3 of them are - they got even darker when they dried
 
This was our second attempt - much less colouring and turned out way better :)

Make sure you put the wet lids well out of everyone's way when they're drying (I managed to drop a spoon into one of ours by mistake and smooshed all the colours) and don't be tempted to try removing them from the lids too early. It'll be obvious when they're ready and start separating themselves.

******

I loved how excited D was when he first spotted them hanging on the window. "I did that!" he shouted very proudly :)