I
think this is actually the make I'm proudest of even though it is
incredibly simple and I can't believe I didn't think of it before. It is
entirely made of things I had lying around the house and took less than
45 minutes to make from start to finish (I know because I managed to do
it during one of Iz's "shorter" lunchtime naps...).
I
first got the idea from this blog and the end result is brilliant - Iz
loves it, D loves it and I love how quiet they are when they play with
it!! If you have anyone be vaguely "baby age" in your house I thoroughly
recommend making one of these!

So what do you need?
A
"base" - I was initially going to use a flat piece of cardboard but
then I got my next "My Little Box" and realised it was the perfect size
and shape - and the fact it folds up on itself without squashing the
contents makes it perfect for storing too :)
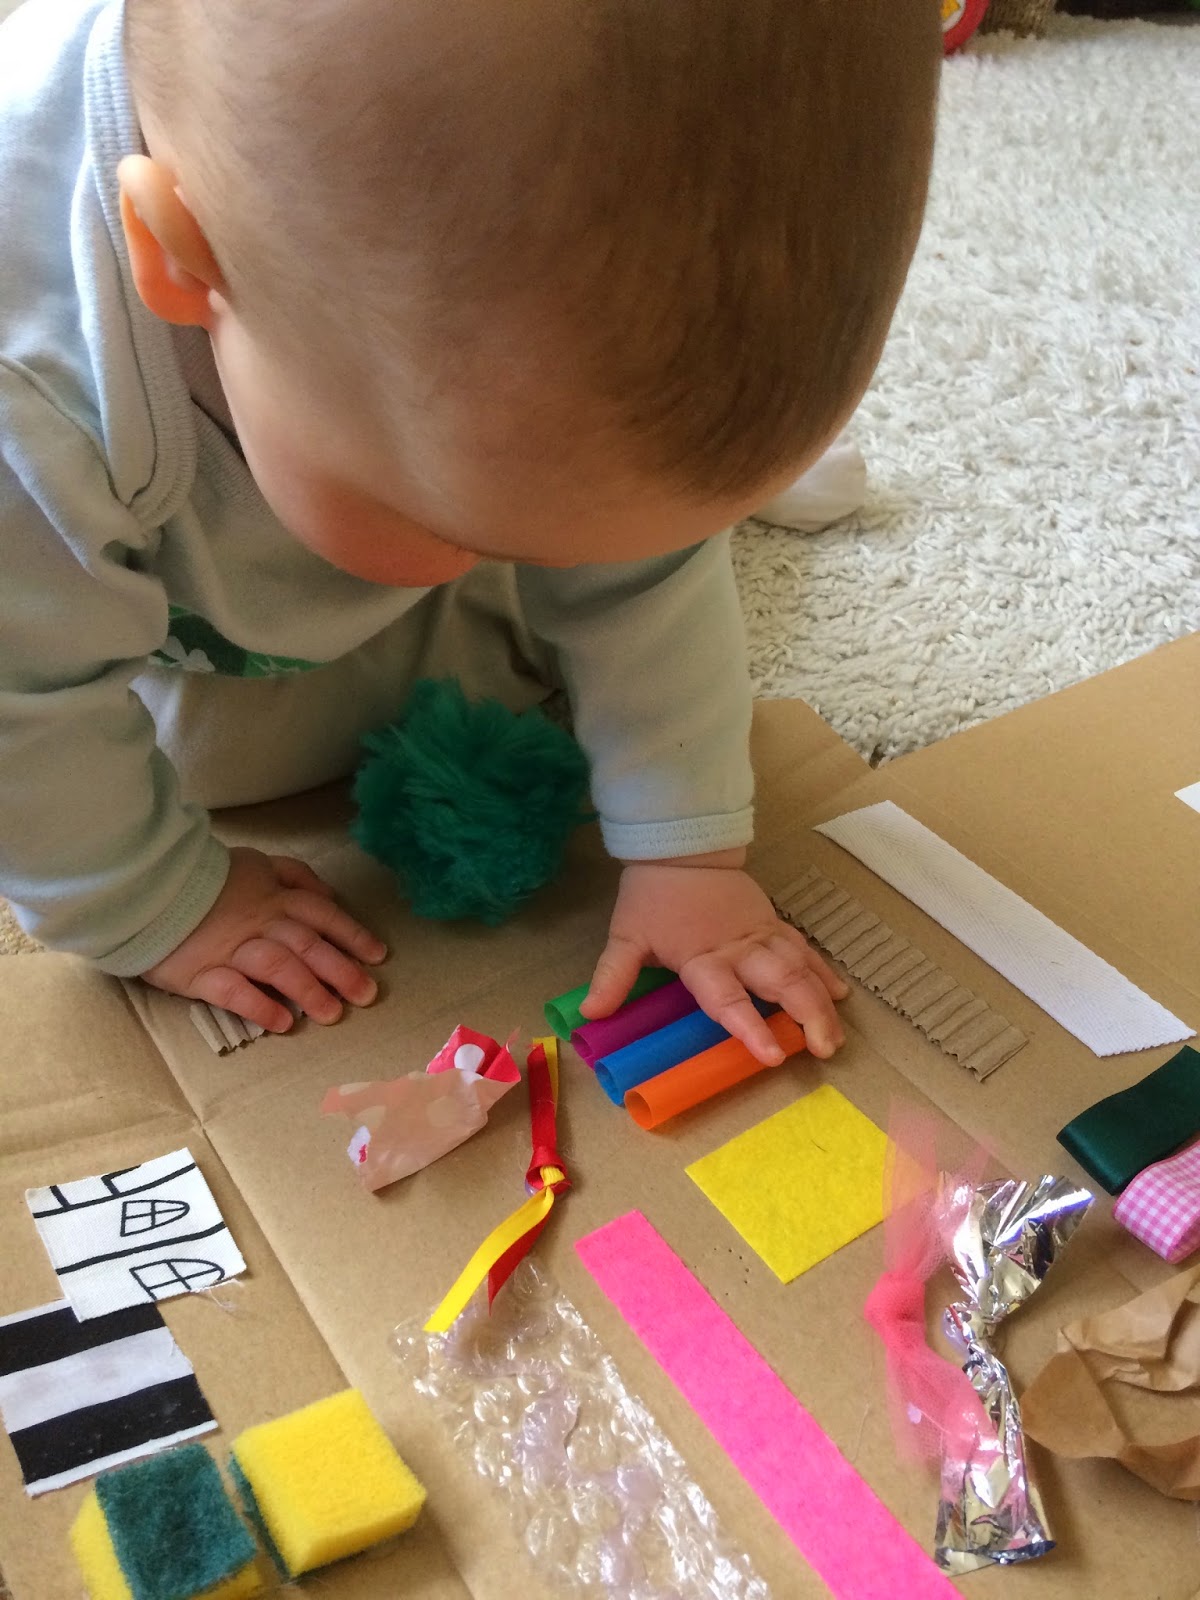
Sensory "bits and pieces" - this is what I used:
- felt
- bubble wrap
- fabric scraps
- large straws
- big pompom
- corrugated cardboard
- loops of thick ribbon
- ties of thin ribbon
- coloured paper
- piece of emergency blanket (left over from Iz's sensory basket)
- the ziploc portion of some plastic bags

My
aim was a variety of colours, textures and materials. Some of them also
had the added element of sound. So it was a proper sensory experience -
sight, touch, hearing :)
Four quick steps to make your own:
1. Assemble all the bits you want to include and lay them out on the base to get an idea of positioning
2. Glue in place with a hot glue gun
3. Leave to dry for at least 24 hours
4.
Then remove any "wispy" glue bits (I clearly need to work on my glue
gun technique!) and give everything a good tug to make sure it's stuck
on firmly
And then play!
 |
| First exploring |
 |
| Even D wanted to join in |
 |
| Must reeeeeeeach it! |
 |
| Ooooo straws |
 |
| Loved the fluffy pompom |
Iz
loved it and probably played with it every day and before she could sit
up it was great tummy time practice. We also used it to tempt her into
crawling when she was first starting to move :) it was a great "go to"
toy when I was trying to get lunch ready or tidy up afterwards as it
would always keep her busy for at least 5 minutes.
 |
| Just checking there's nothing on the underside... |
Note
- before each time I gave it to her I always pulled at the various bits
and pieces and checked they were all still securely in place. I would
definitely advise doing that as things will invariably come loose over
time.
 |
| Close up inspection |
So how did it stand up to baby battering?
Amazingly
well actually. The red dotted paper cup was an early casualty on day 1
(I should've realised it was just asking to be ripped off!) but
everything else lasted nearly 2 months until the pompom came loose and
by this point I felt it was probably past its prime. But 2 months of
entertainment for the price of the glue in my glue gun - brilliant!
******
Disclaimer:
as with any activity involving your baby, use your own judgement and
common sense. I always closely supervise any sensory play and always
inspect items for wear/tear carefully before each playing session. Always make sure you are confident with the
safety of whatever your baby is playing with.
Great. From this, I will be able to make a sensory board for my kids. Thanks
ReplyDelete