Thursday, 29 October 2015

DIY Toddler Glow Stickman

Looking for a last minute Halloween costume? Or just something that looks awesomely cool in the dark on any night of the year? Look no further...


We saw an awesome video called "Glowy Zoey" last year and instantly knew we wanted to have a costume like that. However we didn't fancy spending upwards of £30 on a costume so instead made our own for less than £1.50!

What you need:

- glowsticks (I bought a pack of 20 from Poundland. Not all of them worked but at 20 for £1 I just discarded the few that didn't)
- clear tape (I used clear duct tape but you could also use sellotape)
- some of your child's clothes, including a hat or hooded top

How to make it:

1. Lay the clothes out on the floor
2. Work out how many glowsticks your child will "fit" (D had 3 for his face, 6 on his top and 5 on his trousers. Iz had 2 for her face, 4 on her top and 3 on her trousers)
3. Crack the glowsticks before putting them on the clothes (definitely recommend doing it this way round so you can discard any that don't work/glow strongly)
4. Tape the lit sticks in position on the top and trousers (avoid taping over joints as otherwise they'll just come loose as soon as they move their arms/legs)
5. Make a circle with 2-3 glowsticks (the packets usually have adaptors inside them for this purpose) and tape to either a hat or the hood of their top
6. Dress them carefully
7. Find a dark place and go crazy!!!!!!


D's first costume


Iz's first costume


We had so much fun with it we then did it another time all over again :) this time we also cracked a few more and had fun writing words and "drawing" pictures on the grass - D loved this bit and I'm definitely going to let him do this again during these dark evenings. Such a simple way to entertain him but to him it was the best activity ever!


D's second costume


Iz's second costume


We also made a glow-in-the-dark tutu (saw the idea here on Meri Cherry's blog) which Iz found lots of fun but isn't quite co-ordinated to do the whole spinning round thing yet. So we'll defintiely be making it again in a year or so when her co-ordination has improved!


******

Have you got a costume planned for your kids this year?


Monday, 26 October 2015

9 creative things to do with a Pringles tube

Does anyone else like Pringles as much as me? If so you're bound to have a couple of cans lying around - no need to throw them away, look what you can do with them...


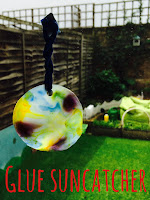
1. Glue suncatchers
All you need is some glue, colours and a Pringles lid. See here for full instructions.


2. A straw dropbox
For time spent making to time kept entertaining child, this has to be one of my best ever makes. Months later it is *still* played with most days! See here for full instructions.


3. Mini golf
We tried this at Center Parcs earlier in the year and D struggled to grasp the concept. Now with his own versatile course in the back garden he can practice to his heart's content!


4. Learning about sizes
D collected a group of different sized balls, ranging from small table tennis balls to his largest football and then arranged them in size from smallest to largest by seeing which ones would fit inside the tube and which wouldn't. Pretty quickly he could judge without using the tube - it was a great introduction to comparing sizes.


5. Artwork storage
Keep all your kid's artwork crease free by washing out a Pringles tube and rolling them up inside.


6. Game of throw'n'toss
I taped 5 small tubs into one of our messy play trays, propped it up on an angle and gave D a collection of small balls. He grasped the concept very quickly and soon worked out the nearer he sat the easier it was!! Iz also loves this set-up (we still have it in play a month later) although she mainly uses it for storing her plastic ducks in...


7. Storing sensory play stuff (eg rainbow rice, coloured pasta)
We've got large tubs to store most of our sensory ingredients in but sometimes it's nice to not be overwhelmed by large quantities of "stuff". The small tubs are the perfect size for activities like this where D was making bracelets by threading coloured pasta onto pipecleaners.


8. Homemade stilts
Remember these from your childhood?! D is still a bit young (ie uncoordinated!) to walk properly on them but he had lots of fun balancing on them :)


9. Pen pot
Leave your mugs free for coffee and use a small Pringles tub instead :)


******

Do you have any other good uses? We seem to have a never-ending supply of empty tubes here!!


Friday, 23 October 2015

Ribbon wheel

Simple sensory fun - you just need a hula hoop (we used one left over from our DIY giant bubbles) and some ribbon.


I then left the kids to play with it how they wanted, occasionally lifting it up around them to change their sensory experience, or holding it up so D could crawl through it (he *loved* this and kept asking to do it!).


I used a variety of ribbon colours, widths and textures to make it more interesting but you could use one colour (eg pale blue if you wanted to have a winter-themed hoop) or another one I think would look really pretty would be a rainbow one - with multiple ribbons of each colour all grouped together. Well, that's my next project sorted!


Simple fun (and easy to store without taking much space) - all that appeals to me! :)
 

Sunday, 11 October 2015

You know you're a paeds doctor when...


1.  You could recite the names of all Peppa's family and friends, long before you ever had kids of your own


2.  Half your patients are healthier than the child you packed off to nursery this morning


3.  Your photo on your ID badge has a sticker of a minion obliterating your face


4.  Your bathroom cupboard resembles the pharmacy aisle in Sainsburys

 
5.  But your other half is thoroughly confused why you never follow any generic dosing instructions


6.  You've seen more babies being born in one neonatal job than anyone needs to in a lifetime (why are resuscitaires *always* at the business end?!)


7.  You think tongue tie is mostly a figment of over-tired over-stressed over-anxious first time mums and over-zealous midwives. Until you have your own child with it. And then you become a complete convert.

 
8.  You are a swaddling pro


9.  You dread people at baby group finding out what you do


10.  Your kid has to have at least biphasic stridor with their croup before you'd think about going to A&E
 
 
11.  But when you end up going you know it's not going to be a short stay...


12.  You can happily call your own child "baby" for weeks because you're so used to using that as a generic name. (I still don't think the grandparents have got over the fact it took us 6 weeks to name D...)


But you wouldn't change your job for the world :)


Saturday, 10 October 2015

Cooking with two: Pizza

Awesomely simple yet great fun and the kids enjoyed it. I've done something similar with D before but this time Iz joined in.

[NB we actually did this just before Iz turned 1 - I think she'd make more and eat less now... Actually who am I kidding?! Lol]

Ingredients:

Pitta breads
Tomato passata
Cheddar cheese (could use other types, that was just what we had in the house)
Sweetcorn
Red onion
Green pepper

You could add anything you have around on top (spinach, cooked meat etc) - our fridge was just pretty empty at the time!


Advance prep:

- cut the pitta breads in half (ie so you have 2 flat pieces)
- open sweetcorn can
- chop up green pepper and onion


What the kids did:

D poured the passata into a bowl and grated the cheese (with my help). Then both kids assembled their own pizzas by spooning on tomato first and then sprinkling on however much of each topping they wanted. 


Then I put them in the oven for 6-8 minutes until the cheese had all melted and the pitta bases were slightly crispy. Mmmmm yummy homemade pizza :)

Sunday, 4 October 2015

Edible muddy worms

If you (or the kids) are in the mood for some (edible) messy play then you can't go far wrong with these muddy messy worms...


What do you need:

- cooked spaghetti (D coloured ours pink with some food gel colouring)
- edible "mud" (recipe below)
- water

Put the "worms" and "mud" in a large tray, add water to some squeezy bottles and step back away from the soon-to-be mess!


D especially loved squeezing the bottles of water into the mud whilst Iz stirred everything together to make totally gloopy sloopy soupy mess...


When I first set this up I was thinking more about how D would play with it, envisioning him digging the worms out of the mud, fine motor practice with tweezers, counting worms etc. What I hadn't banked on was that Iz just fully embraced the mud, quickly climbed into the tub, got mess everywhere and completely took over the whole activity!


The mud was surprisingly tasty too, and although I wouldn't encourage them to eat lots, it was perfectly safe for them to try. Even my husband commented on how nice it was! This is definitely one activity I would recommend running the bath for *before* you start - look how dirty Iz turned her water!


Cocoa cloud dough (aka "edible mud")

Mix 6 cups of flour and 2 cups of cocoa together in a large bowl. Then add 1 cup of vegetable oil and mix well. You can add more or less oil depending on the consistency you want. That's it - edible mud which you can either play with like cloud dough (it will hold together if moulded) or you can add extra water to make sloppy mud (like we did above).


******