Showing posts with label bubbles. Show all posts

Saturday, 14 May 2016

Rainbow bubbles

I first saw a similar idea on Fun At Home With Kids (an awesome blog) and just knew we had to try it. It basically combines my two most favourite things - bubbles and rainbows... And on top of that the kids get clean. What's not to love?! 


What you need:
Washing up liquid
Water
Liquid watercolours (or food colouring but this might stain clothes so beware!)
An electric mixer (the faster the better!)

How to make it:
1. Mix 2 tablespoons of washing up liquid and about 50ml water in a bowl (might need to alter water punt depending on hardness of water)
2. Add a few drops of liquid watercolour
3. Mix on highest speed with electric mixer for a few minutes until all the liquid has become foam
4. Scoop out into container
5. Repeat with different colours as desired

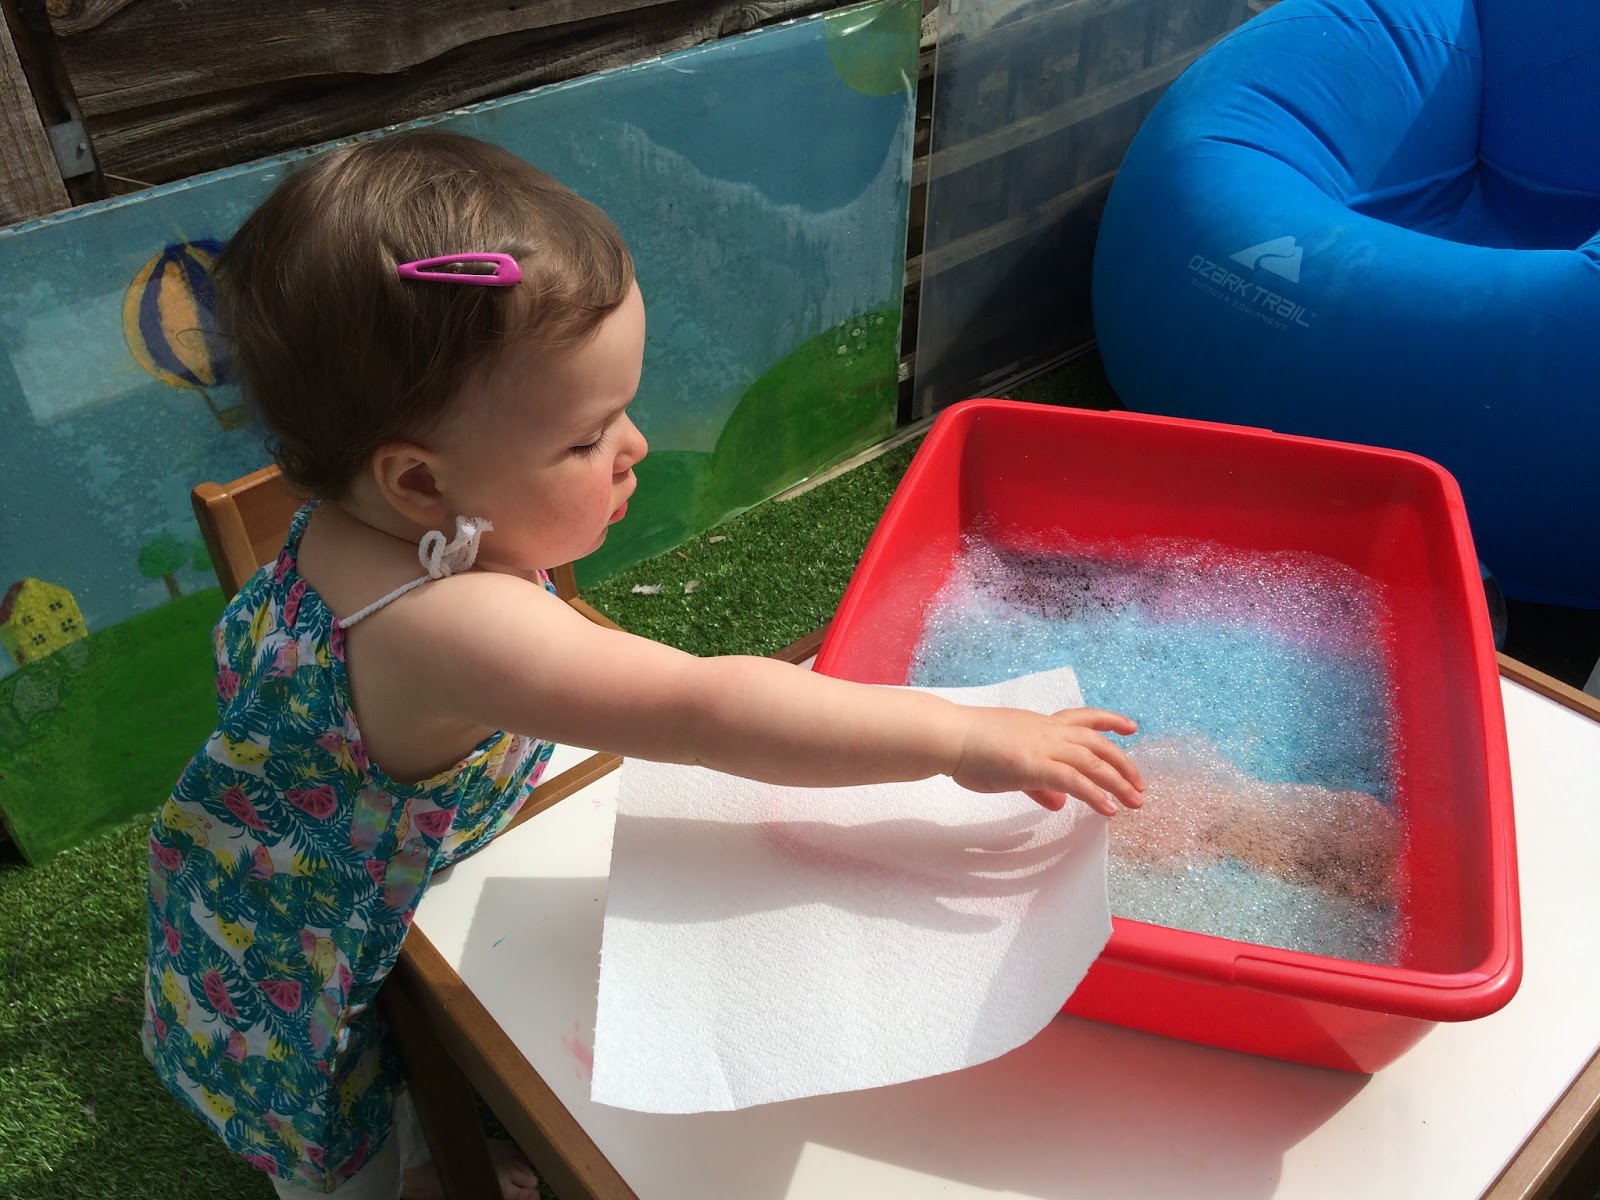
Almost looks good enough to eat!
She was so excited when she first saw it
It probably took me about 20 minutes to make this and that's mainly because we have a rubbish mixer that does not mix very fast!!


Iz loved exploring the foam, clapping her hands in it, watching her fingers disappear, mixing the colours up with a spoon and then giving some of her animals a bath afterwards :)


We've also done a variation on it where I tilted the tray and left the bubbles for an hour to settle. This results in much finer bubbles (rather than foam) which I then scooped out and put in another tray. Iz then did bubble prints using kitchen roll and enjoyed feeling the different texture. 


******

Let me know if you try it - other variations you could try are just dark blue/purple bubbles with glitter (outer space/galaxy sensory bin) or green and blue bubbles with some plastic animals (Land and sea sensory bin) - super simple but super fun!

Friday, 31 July 2015

Bubble art

Kids love painting. And kids love blowing bubbles. Well even better than either of those is...


This activity is so simple to set up and kept D busy for ages. In the end I had to tell him to clear everything away because it was tea time!

I first saw the idea here. Her child was quite a bit older than D though so I wasn't sure if he'd be able to do it and/or find it fun. But it was definitely yes on both counts :)

All you need is some paint and some bubble mix. Both mine came from Poundland so you definitely don't need any expensive equipment! Squirt some paint in a small cup/container (I used our Babycups as happened to have them in the cupboard and they were the perfect size!) and then top up with bubble mix. Aim to have a ratio of about 1:2 and then mix gently (you don't want to make it all frothy). Then lay out your paper, grab your bubble wand and you're good to go...

I can see a hundred different variations of this activity in my head but this is what we've done so far:

Using watercolour paper

This was the first way we tried. I love using watercolour paper for things like this as it absorbs any excess moisture and doesn't warp as it dries.


Just getting going

POP!

Yep he then started blowing bubbles on his hand!

D got the hang of it much more quickly than I thought he would :)

Love the finished pics

Under a blacklight

Our neon paints (from Rainbow Creations) just keep giving and giving :) here I just used them instead of regular paint and then set up the blacklight in D's bedroom (the darkest room in the house).

Blacklit bubble!

Warning - there is bubble splash back so your hands will get neon-ed!!

Love how these pics look great under the blacklight or in daylight!

How cool is the splatter pattern?!


The neon colours also look great away from the blacklight
With a bubble gun 

Bubble-tastic

We also did this using our blacklight - not a great pic as it was dark and D got a bit excited by the massive pile of bubbles! Next I want to use the bubble gun with regular paint in the daylight and maybe set up a long track of paper in the garden and let D run up and down it shooting bubbles :)

On a giant bit of paper

Bubble train...

He loved popping the bubbles and watching them splat outwards
D really enjoyed having a massive blank canvas and he spent a long time blowing bubbles. We also talked about the different colours and how the paint collects in each bubble and then splatters out when the bubble pops.

You can see the yellow paint collecting inside the bubble


Finished picture
And lastly we tried it with lots of straws 

Ginormo-bubble

This was actually D's least favourite variation of all - maybe because the straw bundle was quite large for him? But he still enjoyed making bubble mounds and then whisking the paint/bubble mix together :)

******

This activity was so fun (even my OH couldn't resist joining in!) and you can make some lovely pictures. Some of D's I've mounted on coloured card so he can use them as thank you cards and others I've cut to make homemade gift tags. If you use regular paper instead of the thicker watercolour sheets you could even use it as wrapping paper.

I'd love to see any pictures if you try it :)


Tuesday, 23 June 2015

Edible bubble painting

Remember how you used to blow bubbles in your milk as a child? And probably got told off for doing it?! Well now you can encourage your little ones to do it, and make beautiful pictures at the same time :)


This is a super toddler-safe activity especially while they're learning how to blow consistently. You can also do it with bubble mix (post coming soon) and can make way more bubbles that way but it's not nearly as taste-safe if they accidentally suck!

What do you need?
-  Milk
-  Food colouring
-  Watercolour paper

What to do?
-  Pour some milk into small dishes or containers (I find ramekin dishes the perfect size).
-  Add a few drops of food colouring.
-  Give your child a straw and let them blow!

D really enjoyed just blowing bubbles to start with. He loved seeing different colours and watching how high the bubbles rose.


After a while we decided to make some pictures and tried a couple of different ways.

First D tried putting the paper on top of the dish of bubbles


Next I held the paper at about 80 degrees next to the dish whilst D blew bubbles. I think this method worked much better. The neon food colours were also much prettier than the regular food colourings we tried first.


D did this pic all by himself

I helped hold for this one - so pretty!

After we'd made some pictures D decided on the direction of play. I love it when he takes over the activity as I get to see his creativity :)

First he poured all the colours out one by one.


Then he tried to blow bubbles on the tray (unsuccessfully!).


How pretty is the waste product?!

Meanwhile Iz was doing semaphore in baby jail...


Next D added paper towels and watched as the different colours seeped through and spread out.

And he quickly discovered he could make handprints.


All of these added a whole extra dimension to the activity that I hadn't even thought of - just love his imagination :)

Tips:
- use a thinner straw rather than the fat ones to get better bubbles
- neon food colouring gave much more vibrant colours than regular colours
- use watercolour paper as that will absorb some of the liquid and give nicer pics

******

We had so much fun with this very simple activity and definitely recommend it if you haven't tried it with your little ones. If you make any pictures I'd love to see them :)


Saturday, 16 May 2015

Saturday, 25 April 2015

DIY Giant Bubbles

I love weather like this - when we can be out in the garden having fun, and especially playing with bubbles... Who doesn't love bubbles?! 


So far this month we've:

Juggled with bubbles

 Caught bubbles 


Shot bubbles

 
Chased after giant bubbles


As well as, of course, regular "blowing bubbles"
 

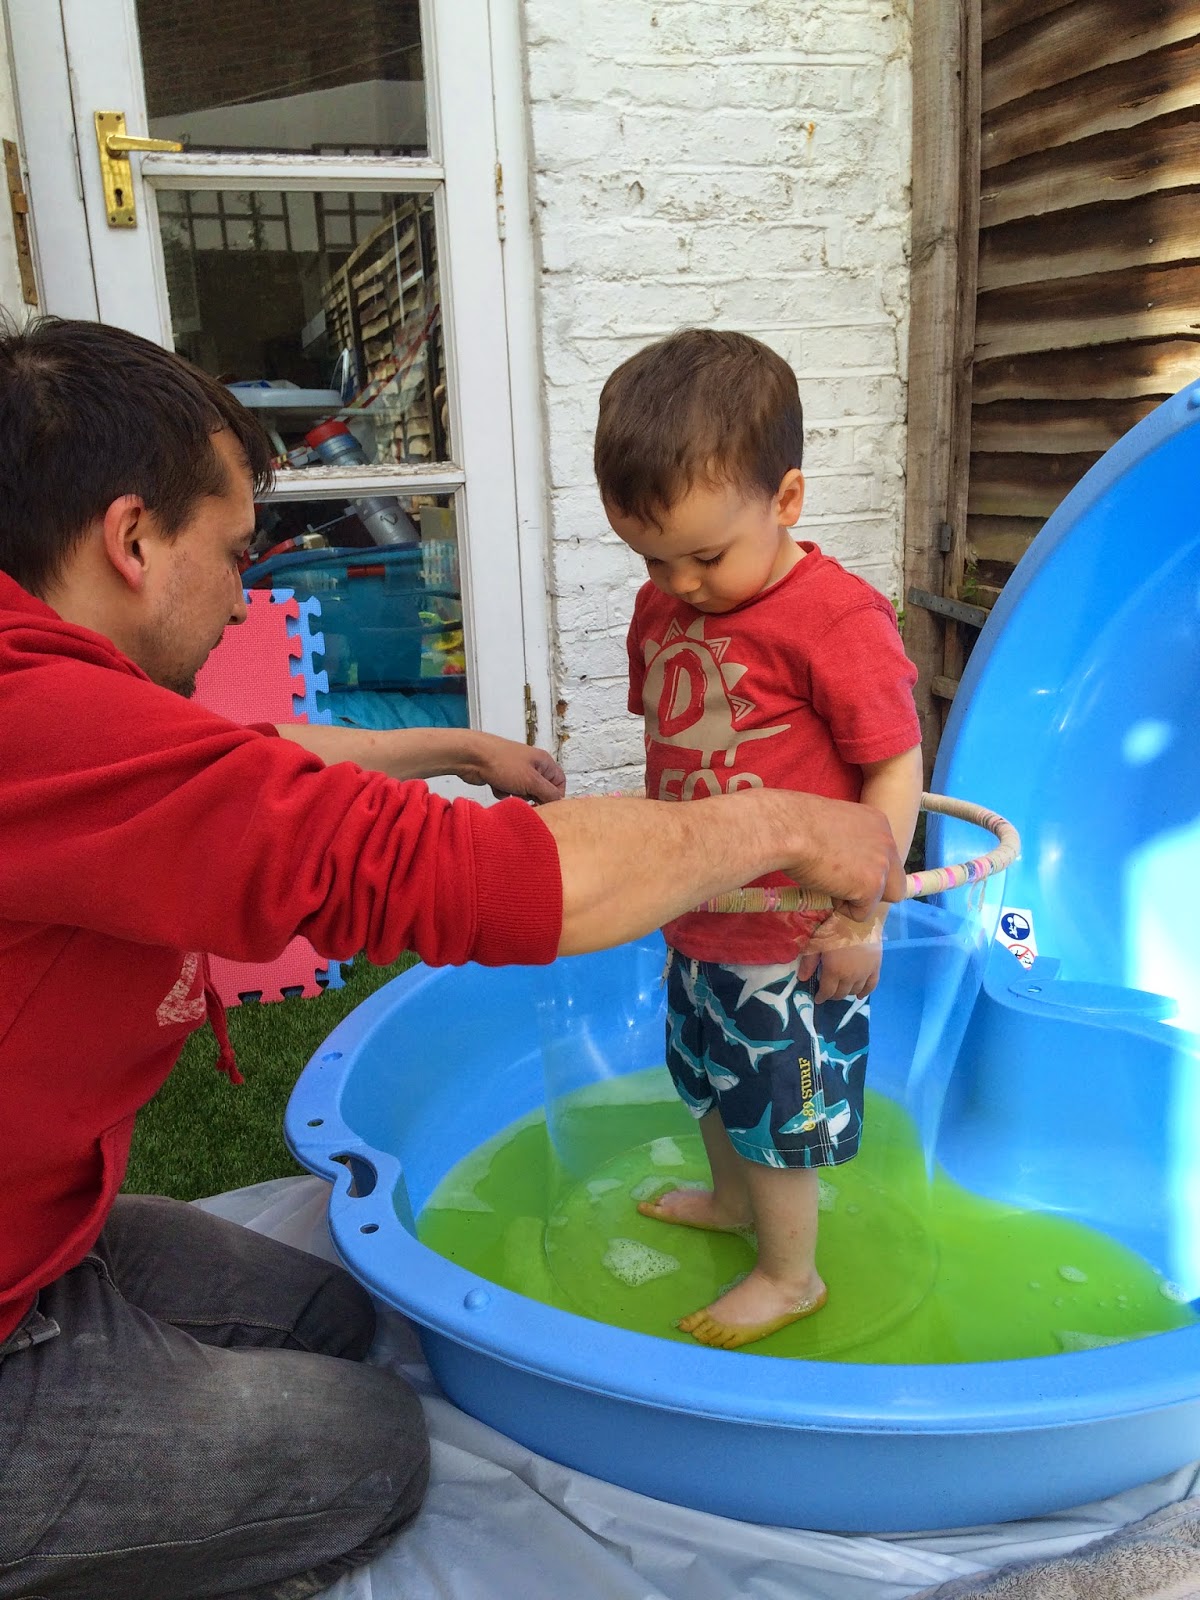
But there's one thing I've always wanted to try since I saw a picture of it last year - encasing your child in a bubble. The dream huh?!

Anyway there are a few blog posts around about different recipes to use but all the ones I found were from America and all recommended either "Joy" or "Dawn" soap, neither of which we have here. And each recipe was slightly different. So when in doubt... Make up your own :)

Our recipe:

675ml (ie a bottle) of Cussons Morning Fresh - we chose this because it was in Poundland. Luckily it worked :)
5.4 litres of tap water
1/3 bottle of glycerin (what we had left from other projects)

Gently mix it all together (you *don't* want to make it bubbly and frothy), pour into a large paddling pool/tuff spot and recruit a willing child :)


First attempt

Getting better...

And better...

YAY!! A full body bubble!!

Woohoo success!

Getting bold now and trying two in a bubble ;)

 Tips:
 
Have a towel next to the paddling pool for the kids to step directly onto after getting out, unless you want soapy footprints all round your garden!

Iz was a bit jealous she wasn't allowed to play

Loop string around the hoop to increase the amount of surface area for the bubble mix to cling to

Here's one I made earlier...

Everyone says leave the mix for 24 hours before using to get best results. We were way too impatient for that and got pretty good results having left the mix for only an hour or two. We're going to leave it in the paddling pool overnight (covered) though and do more bubbles in the morning so will post an update after then :)

I have also read that distilled water can work better. We haven't tried that yet but plan to :)

******

Have you made giant bubbles? Or used a different recipe? I'd love to hear it :)