Showing posts with label cooking. Show all posts

Saturday, 24 June 2017

Toddler cooking solo - Fruit fries

Now Iz is coming up to 3 I am letting her do more and more in the kitchen and am enjoying doing recipes where she can do it nearly all by herself. This is one of those :)

Ingredients:

Packet roll-out shortcrust pastry
Pot of fruit puree (we used one of the Hipp mixed fruit ones we use for pudding)
Egg
Sugar for sprinkling

Directions:

1. Roll out the pastry 

2. Spoon the fruit puree onto one half of the pastry sheet, leaving about a 1cm edge puree-free (difficult to do with an excited toddler!)


3. Fold the uncovered pastry half over the puree and push the edges together to seal

4. Whisk an egg and add 2 teaspoons of water

5. Mix well and brush over the pastry


6. Sprinkle sugar lightly over the top (optional)


7. Cut into strips/fries/squares/triangles (whatever shape you want) - we used a pizza cutter and that worked really well. I did do this bit though because I had visions of Iz just squidging all the filling out the sides!

8. Grease a baking tray and lay out the fries

9. Bake in pre-heated 180 degree oven for 10-12 minutes

10. Enjoy eating!


Monday, 5 June 2017

Cooking with two: turkey koftas


This was a very quick and easy lunch I made with D and Iz, and the best bit was it made so many patties that we froze a load and could then pull them out to use later. The kids were also really excited to eat something they had made themselves and were very proud of their creations!


Ingredients

1 small red onion
Small amount olive oil
1 red pepper
1 clove garlic
1 slice of bread
300g (roughly) turkey mince
1/4 teaspoon mixed spice

2 tablespoon thick yoghurt
1 teaspoon chopped fresh mint
Cucumber


For koftas:

1. Chop onion and fry in olive oil
2. Add in crushed garlic and diced red pepper
3. Place in mixing bowl and add rest of ingredients (turkey mince, mixed spice)
4. Grate a slice of bread (preferably an end piece) and add to bowl
4. Mix well and roll into small balls
5. Squash into patties and dry fry over medium heat until cooked through
6. Serve with dip below

Make any leftover uncooked mixture into balls and wrap individually in clingfilm before freezing. Then you can take individual patties out of the freezer, just defrosting the number you need each time.


For dipping sauce:

1. Chop cucumber into small pieces
2. Finely chop mint leaves
3. Mix with the yoghurt


Thursday, 17 November 2016

Making a Spiderman minifigure cake

If you've ever read my blog around either of the kids' birthdays then you'll probably know I like making cakes for them. I don't cook all the time but do like to try something a bit different to celebrate their birthdays. 

D is really into Spiderman. He's never watched it, I have no idea where he's ever seen him... But along with most preschoolers, he seems to be numero uno. So this year I decided to make a Spiderman Lego mini figure cake :)

Disclaimer: I have zero experience in using icing/fondant in this way - this was my first try. I even had my husband on standby to drive to 24 hour Tesco in case it all went wrong and a replacement cake was needed... But it was actually pretty easy and the end result was really cool (or so I thought anyway!!).


How to...

1. Make the cake mix (I cheated and used a Betty Crocker box recipe. Easy and delicious!)

2. Liberally spray the mould with lots of cake release spray - make sure you get every nook and cranny. Then pour the cake mix into the mould - I used a piping bag with the tip cut off which was an easy way to make sure every area was fully caked-up.


3. Depending on the size of your baking tray, use some cookie cutters to "wedge up" your cake mould so the man doesn't get distorted during cooking


4. Cook the cake for way longer than packet says! I started testing mine with a skewer after 25 minutes (time stated on cake mix packet) but actually had to cook it for 45 in the end! 


5. Once cooked, remove from oven and leave in the mould for about 30 minutes. Then trim off any excess you need to and flip it over onto a cooling rack. If you sprayed it enough in step 2 then it should slide out very easily.


6. At this stage you can freeze the cake if you've made it in advance. Wait until it's fully cooled and then carefully wrap fully in clingfilm before freezing. You can then decorate from frozen at a later date.

7. Roll out some blue fondant. I used a silicone mat with a sprinkling of cornflour on top to stop it sticking. Then just drape it over the body and legs of your man. Smooth down carefully and trim around the neck. 


8. Next roll on red fondant and drape over the head, smoothing it down and trimming it around the neck where it meets the blue.


9. Push the fondant under the edge of the cake and trim all round the edge.

10. Cut out a red breastplate (I used a kitchen roll template to help me get the right size), the belt and gloves. Also use some white fondant or gum paste to make the eyes. Paint the underside of each item with a little water so it sticks to the base fondant.


11. Colour some gum paste with black food colouring (watch out for your hands!!) and mould a spider. Leave to dry - overnight if possible so the legs are nice and secure!


12. Paint on the web lines. For the torso I used a bottle of black icing and just cut the tip off to make a fine nozzle. On the face I painted using food colouring so I had slightly more control.


13. Add any extra decorations you want - I added D's name on the feet and piped chocolate icing around the outside.


14. Add some candles, show to your impressed husband/child and enjoy :)


Tuesday, 1 November 2016

Apple flowers

You know the random posts that sometimes appear on your facebook timeline and you think "wow, that would be so cool to make" but you think it will probably be way too much effort and not work out... well here is a success story!

Apple pastry flowers


Iz and I made these last weekend. Surprisingly quick, most steps were toddler-able and the end result was delicious!

Ingredients:
Apples (we used braeburns)
Apricot jam
Ready-made puff pastry (pre-rolled)
Lemon juice

Recipe:

1. Core and finely slice the apples


2. Put slices in microwaveable bowl, fill halfway with water, add a generous squirt of lemon juice and microwave for a few minutes until slices are pliable/bendy

3. Roll out pastry and cut into long slices

4. Make apricot jam paste (mix equal parts apricot jam and water, mix well)
 and spread onto pastry slices


5. Arrange apple slices on top half of pastry long edge (see picture below for orientation)


6. Roll up gently


7. Place "flower" in cupcake case (optional but we did it as much easier to get them out of the pan afterwards and also the kids love unwrapping cupcake cases!)


8. Cook for 20-30 minutes at 180 degrees - watch for the pastry turning golden

9. Enjoy either on their own or serve with a dollop of creme fraiche or yoghurt - delicious!


Thursday, 13 October 2016

Our first foray into children's parties...

So Iz turned 2 a few months ago. When D turned 2 we were on holiday and so took a trip to the local aquarium, had a cake and everyone was happy. But this year we were about to move house and D had realised when it comes to his birthday he will be at a new nursery and not with any of his current friends (sob sob - I'm finding the whole leaving thing very stressful!!). So we decided to throw a joint Iz birthday/D very early birthday/leaving nursery party and even though it was prime summer holiday time, a nice amount of their friends were able to come :)


This is the first children's party I've ever organised - oh how fun it was arranging everything but also how stressful as you wait for your first guests to arrive! You could completely wing it but I think that would make you very brave... I found it much easier having a detailed schedule of timings (that could also be the obsessive neonatologist in me!) especially as there were lots of toddlers involved... so this is a rough overview of what we did:

Kids arriving from 2.45 (the lovely facepainter started a bit earlier so D and Iz could be painted before everyone else arrived)
2.45-3.15 - Garden balloons and colouring, facepainting
3.15-3.30 - PiƱata
3.30-4.15 - Animal show
4.15-4.30 - Cake
4.30 onwards - picnic tea outside

I'll give some more details below. This post is completely unsponsored, I'm just happy sharing some of the fab people we used to make the party really memorable!

******

In the garden 

In the garden I'd laid out a rug and a giant colouring scene. Each children had a named box which contained a DIY animal balloon (so cute and easy to make for even the youngest guest), a star wand and 4 crayons. In the end everyone made the balloons but didn't do any colouring - I think probably because it was just so hot outside!


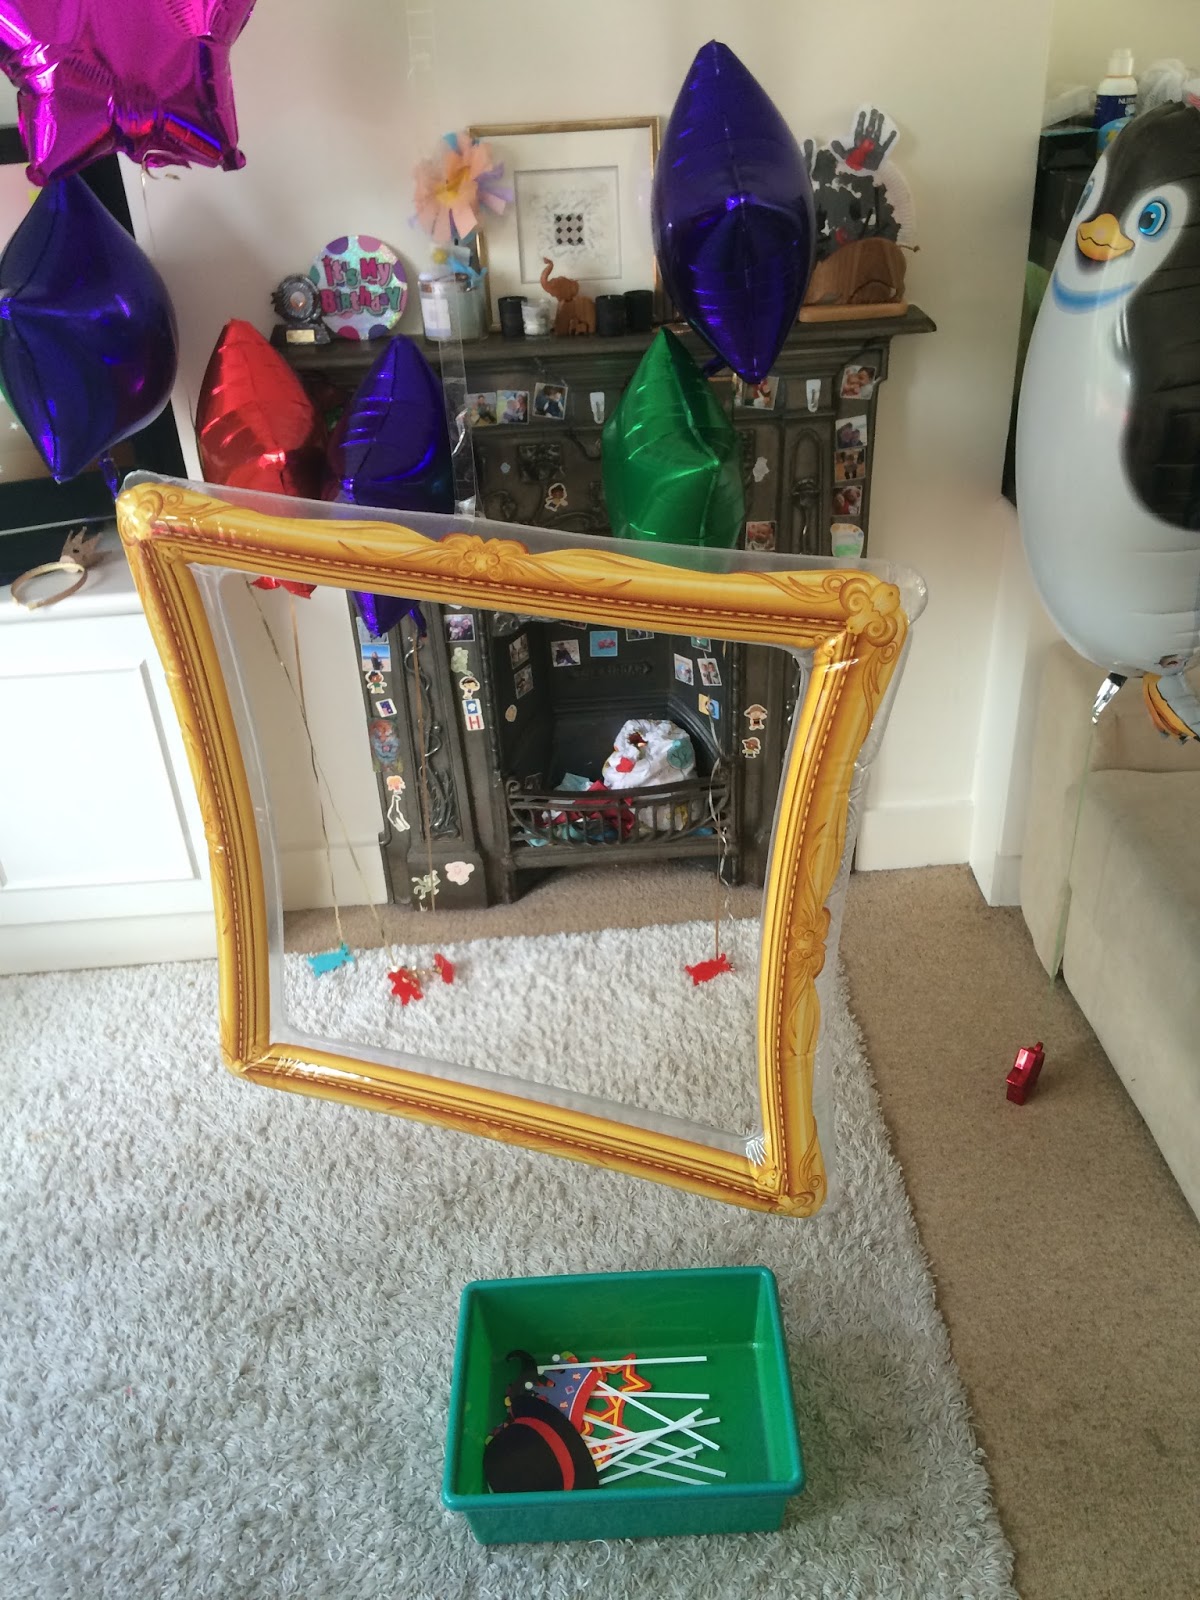
Hanging frame

I bought this giant inflatable frame from Amazon and it was so much fun!  It was initially suspended from the ceiling so you could stand behind it but pretty rapidly it became the casualty of someone trying to swing on it so you had to hold it up instead. We did have some little props which D and Iz had loads of fun with before anyone else arrived but in the mad chaos of 30 people in our tiny house, soon got over-looked. But the great thing about this set of stuff is it is all completely reusable so I have now put it away ready for the next party :)


Pre-prepared picnic boxes

We had a picnic tea on the common outside our house and I pre-prepared individualised picnic boxes ahead of time. I got some cute princess lunch boxes and into each one put a juice box, two sandwiches, a packet of pombear crisps, a packet of raisins and an Organix snack bar. This made it so easy at teatime as I could just hand out one to each child quickly without having to worry if everyone had enough food etc. It also made it super simple for the child who had multiple food allergies as I just prepared her a different box ahead of time.


Facepainting 

Our facepainter was AMAZING! The designs were way better than anything I expected for toddlers and Katy was so good - not complaining at all when I gave her the teeniest space to work in and working really quickly so the kids didn't lose interest. If you are local to West London and having a party definitely contact Katy (http://www.cheekychopsfacepaint.com/) - if I could persuade her to come to us next year after we've moved house I would!!


Animal show

I've never seen one of these for toddlers before and I'm not even sure where I got the idea but I'm SO glad we did this! Zoo4You came to the house, brought 8 animals and the result was an awesome show :) the kids all sat round in a semi-circle and Declan brought the animals out one at a time. D and Iz got to hold each one first because it was their party and then everyone else got a turn afterwards. It was amazing! We had a tortoise, hissing cockroach, bearded dragon, snake, chinchilla, parrot, rabbit and skunk.


Iz was super brave and held all the reptiles. When the cute soft chinchilla came along though she started screaming and point-blank refused to hold the rabbit... Some children are funny!! It was a really nice mix of animals though and it was lovely that all the children got a chance to hold them if they wanted. 


I will definitely be asking Zoo4You to come back for another party in the future. They are based in Chelmsford, Essex and cover anywhere within a rough 2 hour diameter. They were always really prompt at replying to messages and answering my (many!) questions.


PiƱata

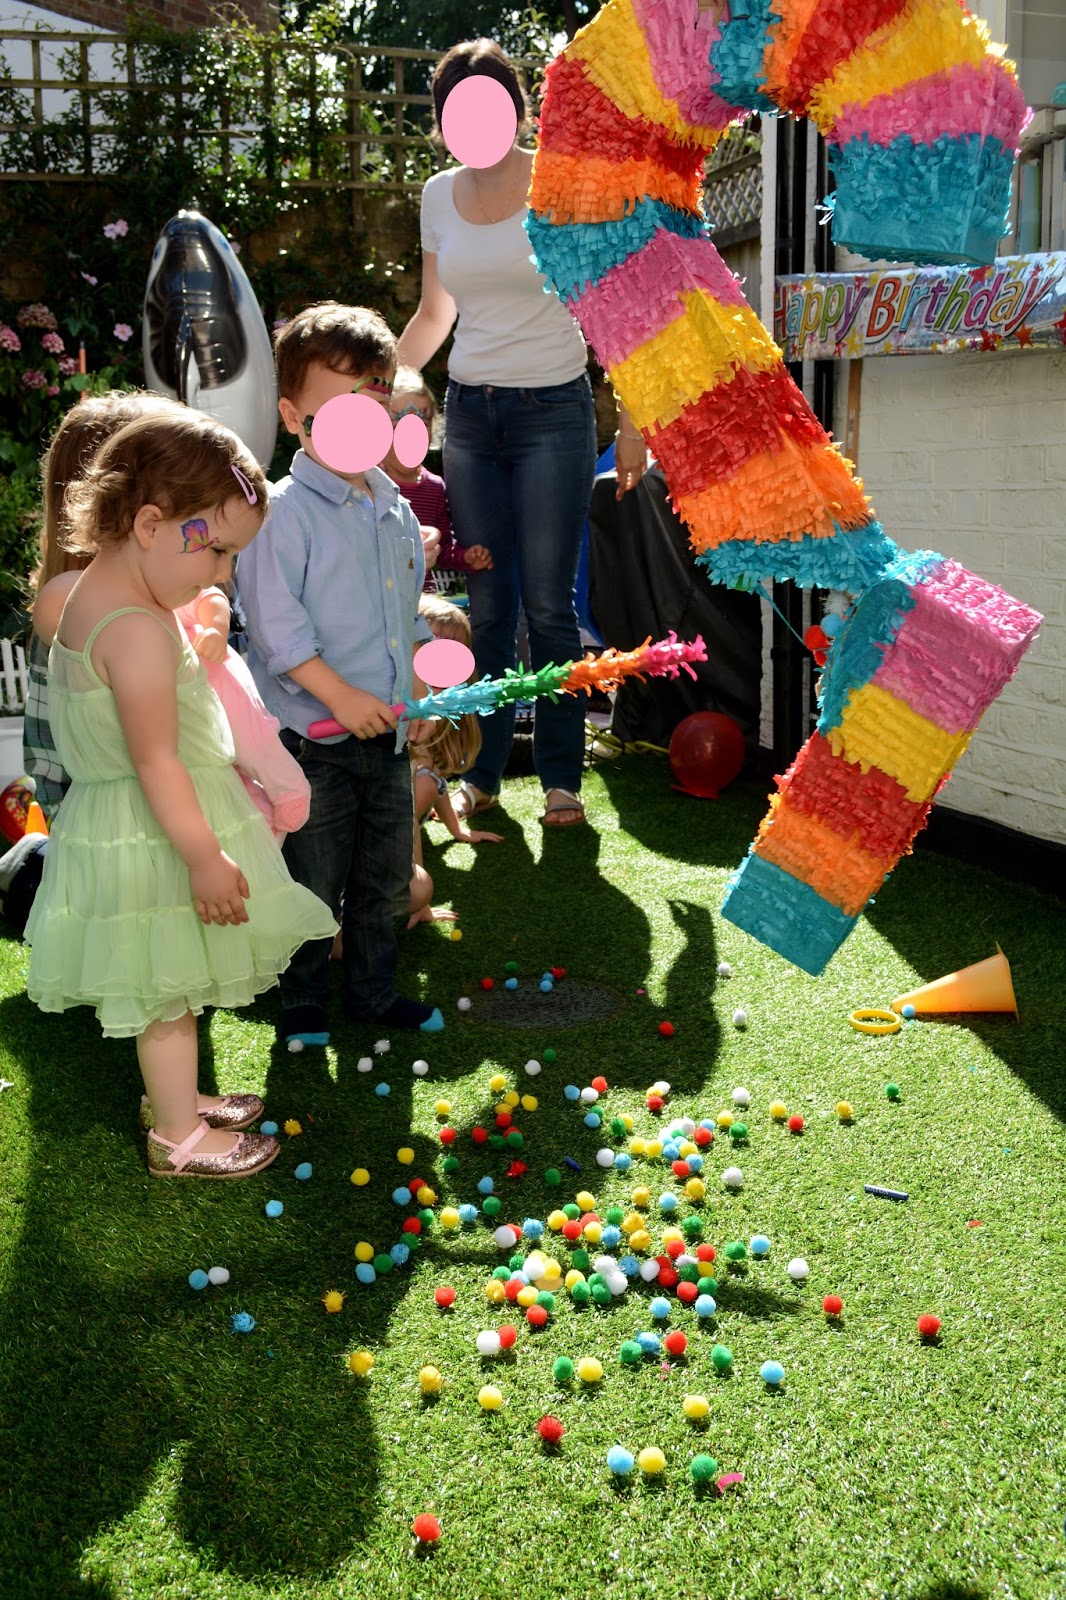
I first saw this numbered Pinata on Jersey Momma's blog (thank you!!). As we had a party of toddlers I filled ours with pompoms instead of sweets (no thank you to a crazed sugar high!!) and 10 bangles (one for each child). Once the pinata was broken they took a bracelet each and later swapped that for a party bag.


Photographer

This might sound a bit crazy to have at a toddler party but I'm pretty photo obsessed and there's no way I could've taken photos and organised timings and made sure everything was going to plan... And Mr MFDS is rather minimal about photo-taking... After 3 years I don't think he's ever had to clear space on his iPhone (slightly different to me - having to do it every other week!!). Our photographer was Sarah from Sarah West photography and she was brilliant - friendly and very unobtrusive, happy to just mingle and take candid shots. A really lovely photographer to have around. All the party photos above are hers and she also took some nice family ones at the start before anyone else arrived.

And actually having a photographer, facepainter and animal show worked out cheaper than having a party at our local soft play. Crazy huh?! 

******

Overall the afternoon went very smoothly. Mild rocky patch when the parrot decided to mistake Iz's plump arm for a nice branch to land on but that was quickly forgotten... It took quite a lot of organising as there were so many little bits but I wouldn't have had it any other way - I really enjoyed thinking about all the little extras. Maybe by the 20th kid party I've thrown I'll have got bored but this was my first and I loved it!!

I haven't talked about the rainbow candy number cake here but everyone loved it and having made one I now have a few insider tips so check out my other blog post about how to make one.


So if you're planning a toddler party extravaganza I say go for it! Let your imagination go and my top tip is - embrace Amazon with open arms! I do try to buy some things locally but Amazon has everything you could ever want pretty much (and more!).