Showing posts with label rainbow. Show all posts

Thursday, 13 October 2016

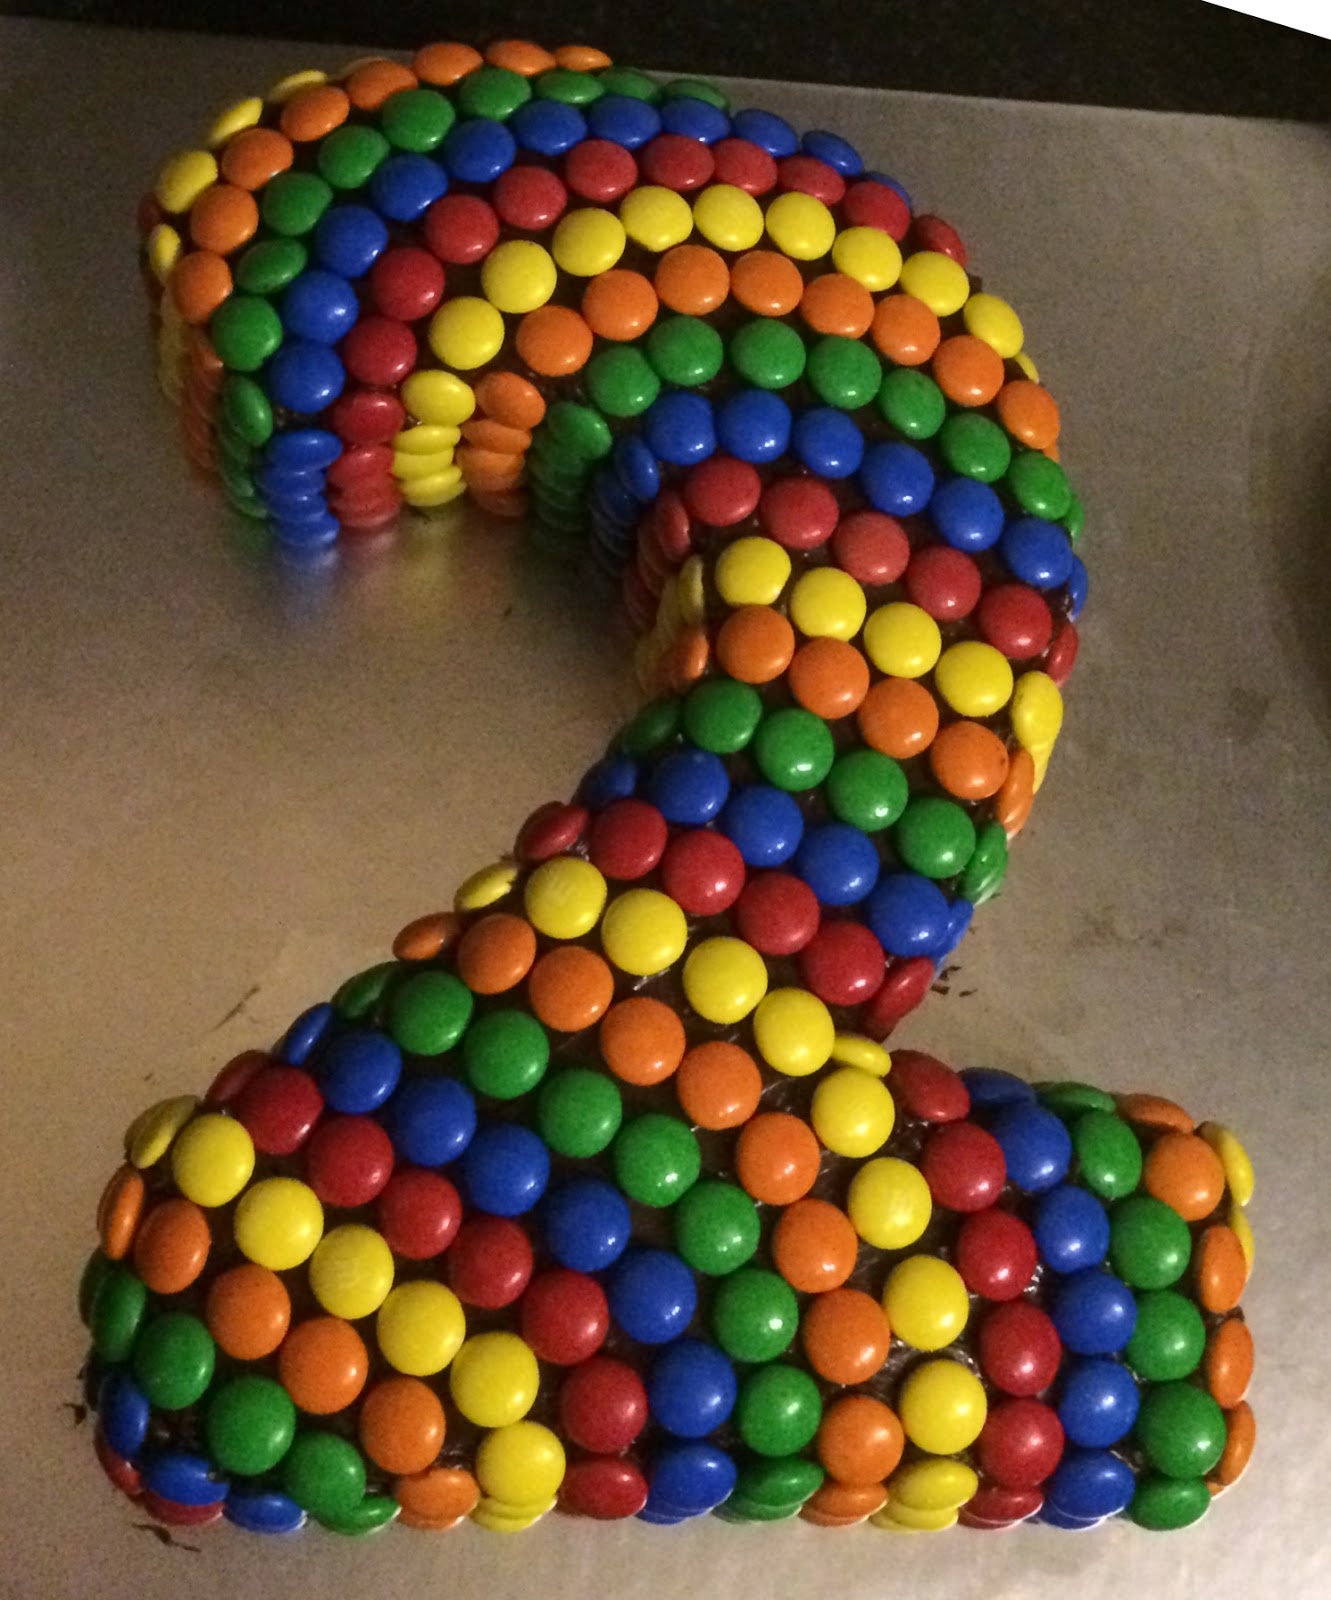
Candy number cake

I made this cake for Iz's second birthday and although very simple to make, it was really visually striking and I got so many nice comments about it :)


How to make it:

1. Make your number cake in whatever style you want - I did a chocolate cake and used a "2" cake tin (although check out Pinterest for loads of ideas on how to create numbers from round cakes if you don't have the right number pan)


2. Cover the cake with a thick layer of icing

3. Buy a lot of M&Ms or Smarties - I bought 6 multipacks and actually had way too many at the end. Separate out the colours - this takes much longer than you think!  


4. Add your M&Ms - you can use any pattern you like. I'd seen a cake where the lines went horizontally across but I wanted a slightly different look so went with a more diagonal approach, starting at the centre and then working my way out from there. I carried the colours over the edges and just kept the pattern consistent, which meant the lines curved nicely


Ideally do this just before the party as I made it the day before and got some fading of colour on some of the candies (see below).


I had been storing the cake in the fridge and some articles on the internet said the change in temperature could make that happen. So I kept it at room temperature. And it still happened, and maybe a bit more quickly. So I just put the cake back in the fridge and then on the morning of the party used clean tweezers to remove the most discoloured sweets and replaced them with new ones (luckily I hadn't eaten the leftover extras in the meantime!!)

5. Add some candles and show your super impressed birthday child :)


Thursday, 29 September 2016

Playing with giant waterbeads

If you've already tried regular waterbead play then check these out - 10x bigger and sooo cool!

I got mine from ebay in a pack of about 35. You hydrate them in the same way, and actually to start with you can't tell they're going to be giant so it could be an exciting surprise for your toddler if they are used to the small ones.
Once they are hydrated you use them in lots of different ways - these are the things we did:

(note - as these are bigger than ping pong balls they are really satisfying for toddlers to squeeze in their hands... this meant our giant waterbead play ideas were mainly limited by the rate at which Iz in particular was destroying them!! I think they are also a bit more fragile than the small ones but they are just so fun!)

Playing I-spy

They loved that the other person became upside down and D had lots of fun making Iz different colours.


Shaving foam soup

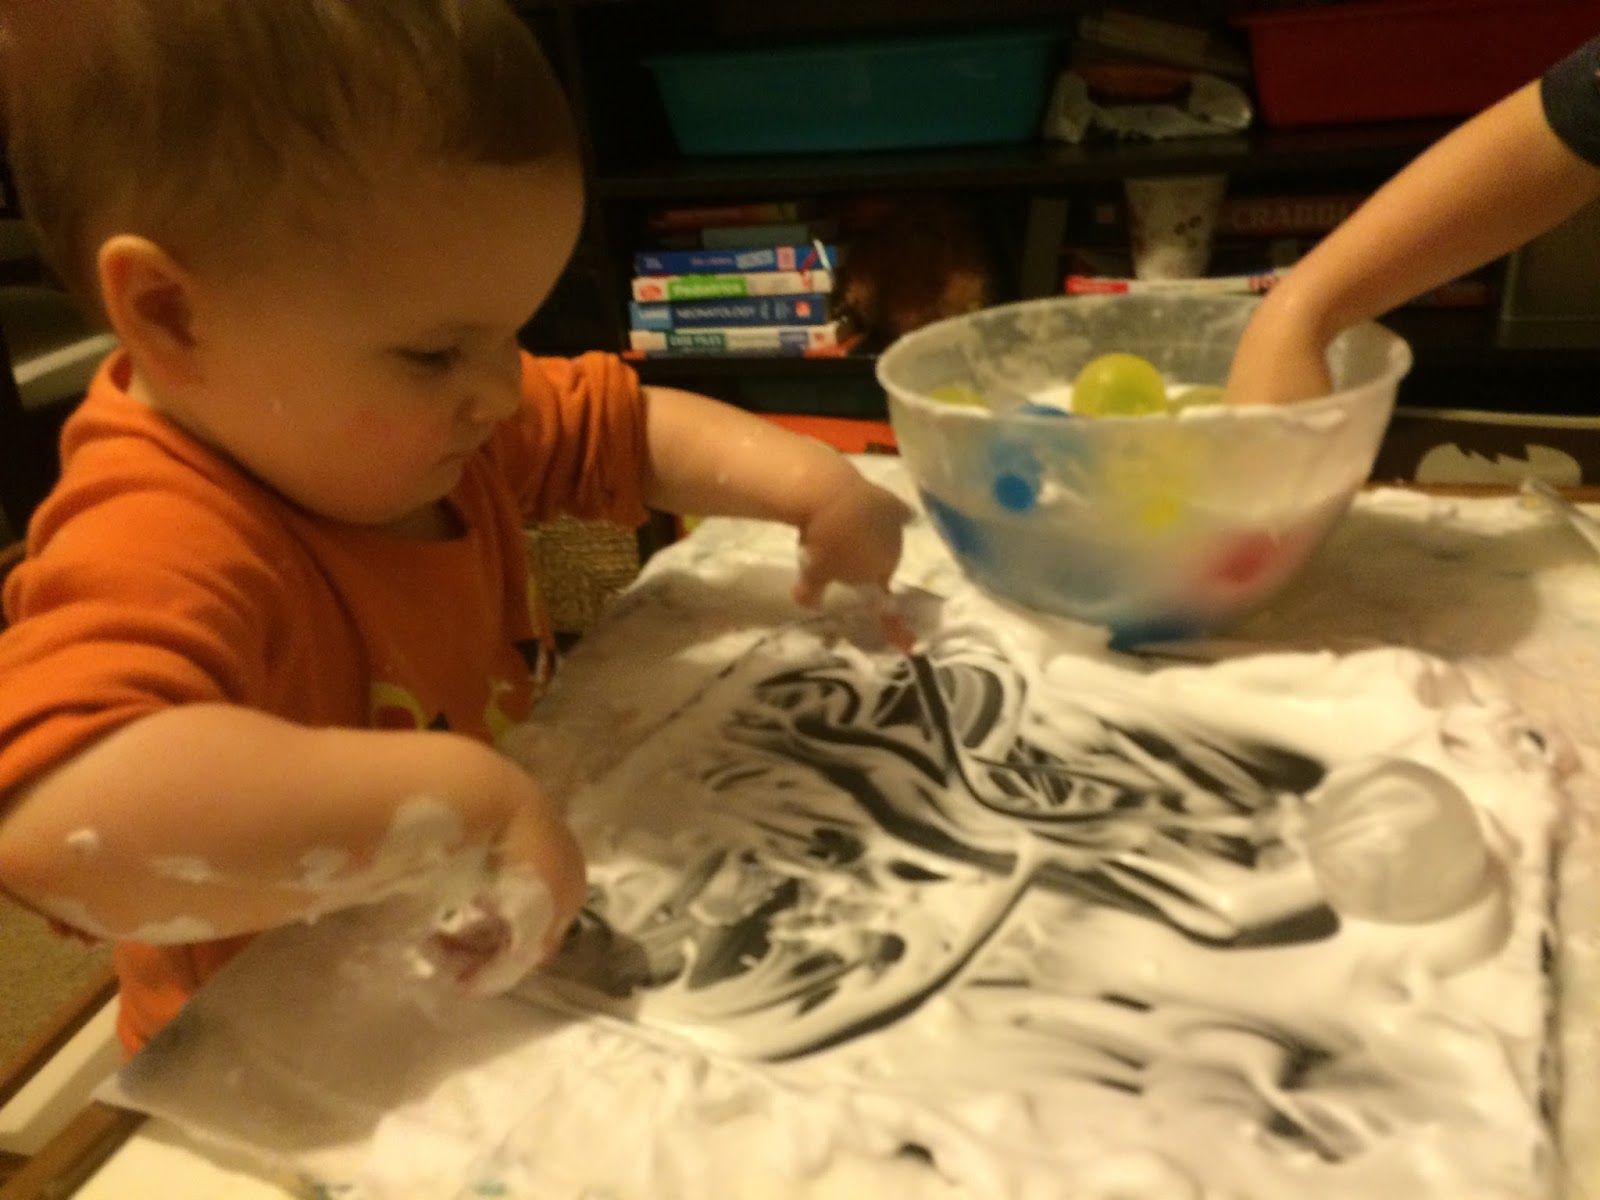
You can't really go wrong with adding shaving foam to your play (as long as your child isn't still in the eat-everything phase). D and Iz spent over an hour putting the balls in trays of shaving foam, washing them off, putting them in again, and repeat! D made patterns of different colours, practising grouping them together whereas Iz just embraced (as always!) the mess...


Sorting colours

The colours are so vibrant, they were lovely to just look at. We played with them dry in a bowl and also in a tray full of water. Simple change but added a whole different feel to the sensory experience.


And finally... Squishing them

Well you can't be a complete spoilsport when that's what they really want to do!! ;)


Picture of innocence despite the squished ball between her legs...


******

A lot of these are similar to the games we played with regular waterbeads but the fact they are now giant lends a whole new dimension - I promise, give it a try!


Wednesday, 22 June 2016

Freezer cake cookies

Have you ever made something awesome completely accidentally? Yep I can now say that we definitely have! 


I remembered the cool pinwheel cookies we used to make as children and thought they might be fun to make with D and Iz. I couldn't remember the recipe so googled pinwheel cookies and one of the first recipes was an Australian one. I'm still not sure whether I wrote the quantities down wrong, interpreted their recipe differently or whether it was the result of the freezing and layering... But I ended up with a completely different result. Luckily it resulted in really delicious cookies that taste more like cake, and best of all the mixture is totally freezer-friendly so you can just keep a roll in the freezer and just slice off a few to cook fresh when friends come for tea - yum!

Ingredients

250g unsalted butter
330g caster sugar
2 eggs
2 teaspoons vanilla essence
450g plain flour
1 teaspoon baking powder
1 tablespoon of cocoa (if you want a brown colour)
Food gels as desired 

Method


Cream the butter and sugar together and then mix in the eggs and vanilla. Then slowly add the flour and baking powder and mix well together

Separate the mixture into different bowls - one for each colour - and add a small amount of coloured gel or cocoa and mix well

Wrap each lump of mixture in cling film and put in the fridge for at least 30 minutes

Remove from fridge and roll out between 2 layers of baking paper. Then use a pastry brush and use water to "glue" the different layers together

Carefully remove the paper from each layer and roll up like a swiss roll, then wrap in clingfilm and put in the freezer

Freeze for about an hour and then cut off as many cookies as you want

Cook for 15-18 minutes at approx 160-180 degrees (fan) - they do get much bigger so leave enough room between them!

Cool on a cooling rack (ideally not tasting them all as you do it Iz!)
 
If you want to have a 100s&1000s coating then roll the sides of each cookie in a plate of them *before* cooking

And enjoy...

Mmmmmmm delicious! We still have a roll in our freezer ready for last minute cookie emergencies...

If you try making them I'd love to hear how it works out :)

Thursday, 16 June 2016

Rainbow pasta

This is a great thing to make once and then keep in a jar and bring out whenever the kids are bored or want something slightly different to do. Because the pasta is not cooked it will keep for ages - we've had ours well over a year now.

To make it, use a similar process to the rainbow rice (see here). Put the pasta in a ziploc bag, add some food colouring and a small bit of vinegar and shake like crazy until the colour is evenly distributed. Then spread out on a covered baking tray to dry and make the next colour. 

So how do we play with it? There are so many things you can do (and your kids will probably invent a few games of their own!) but here are a few things we've enjoyed doing over the last year:

Counting

Super simple but a nice way to practice counting. D tends to count a pile out to Iz, who then counts it back to him :)

Making necklaces (or other miscellaneous objects!)

Add some pipe cleaners or ribbon and you can make bracelets, necklaces, crowns, belts... Good for manual dexterity/manipulation as well as dressing up fun!


I think Mr MFDS had a lot of fun making this creation!

Threading on spaghetti

Use a lump of playdough as the stand and get threading. D made a rainbow tower, Iz kept breaking her spaghetti as she was too rough with it and so ended up improvising and making a hedgehog!


Sorting colours

This was great for D last year and Iz is now the perfect age. You can get them to sort the colours, identify the colours or pick ones based on what colour you say.


Building towers freestyle

Self-explanatory. The highest we've managed to build so far is 12 pieces high :)


******

What's nice about this toy is that I'm happy for them to get the bottle out by themselves and they feel so grown up unscrewing the lid and deciding how many pieces to take out (although who am I kidding - if it's Iz in charge then it's usually the whole lot!). Definitely worth the initial 20 minutes prep time!

Monday, 16 May 2016

Rainbow ball stacker (or how to wow a YouTube-pro toddler)

So... I really hope I'm not alone here but D used to be addicted to those egg opening videos on YouTube. Don't know what I mean? Search "kinder eggs" on YouTube, show it to a nearby toddler and marvel at  just how fascinating they find it watching someone else open eggs to see what toys are inside...

Anyway, D used to love them. He still does but he doesn't watch them much anymore. They were definitely my guilty must-go-to though when I was stuck breastfeeding Iz and wanted a quick way to entertain D. He always used to ask me to make him a big bucket of eggs but the cost (accompanied by the thought of sugar-driven energy buzz that would follow) always acted as a pretty powerful dissuader... But I thought it might be fun to come up with some sort of surprise for him, so this is what I did:


Basically it's a very cheap to make, completely reusable ball of fun! The whole thing cost me less than £3 and it provides hours of entertainment.

What you need:
Plastic cups
Stapler
Selection of small toys 
"Ball pool" balls

Toys I used - selection from previous Kinder eggs and anything small we had lying around!

How to make it:
1. Lay some cups on the floor and staple the sides together. Because the cups are tapered (ie cup shaped!) a circle will automatically form. The size/shape of your cups pretty much dictates the size of the final product. 
2. Then add a second layer - again the cups should naturally taper downwards at their bases due to their shape and so this layer will be smaller and slightly more vertical
3. Continue building layers, stapling each cup in place, until your dome is complete!


4. Next gather your collection of toys and put one in each cup. Don't worry if you don't think your toys are very exciting, or that they are things your toddler plays with every day. I ran low of items and even included some single Lego blocks which D still thought were the best thing ever! I only included 3 new toys in the whole thing - all Lego minifigures which D loves. You can also leave some cups empty so it's a surprise if there is anything need the ball or not. 


5. Put a ball in the mouth of each cup. If you don't have any balls you could use silver foil to cover each hole (although that would be pretty time consuming!) or a scrumpled up tissue. But we love our balls - perfect for so many things (yoghurt painting and outside coloured water fun to name just two) and you can get 100 for about £3 in most big stores.


I left the dome in the middle of the floor so D and Iz would see it when they woke up the next morning. Initially curious and slightly unsure whether they were allowed to touch it, once they realised they could and it was just for them they were so excited.


It was easily big enough for them to play together whilst having their own little area to explore.


Good fine motor practice removing the balls (my big adult fingers actually found it much harder than they did!) and using a pincer grip to remove the toys. Then language skills trying to describe what they found in each cup. Iz was so excited to play with all her "new" toys!


D played with it about 45 minutes the first day (he only stopped because it was nursery time) and in the evening he played with it as soon as he got home. Once he'd taken all the toys out, he then sorted them and then put them all back into the cups, replaced the balls and then started all over again!


They played with the dome every day for just over a week - until it succumbed to the general forces of play and the cups started to break. I suspect if I'd used plastic cups from somewhere other than Poundland it would've lasted a lot longer though!!


Definitely a very good make :)