Showing posts with label foam. Show all posts

Friday, 17 July 2015

Water bead play for toddlers

A few months ago I wrote about water bead play ideas for babies (see here) and an awesome waterbead waterbed but I originally got them for D, not Iz, as they are NOT taste-safe and you need to watch carefully to make sure none are eaten. Luckily D is now out of the "must-eat-everything" stage, although I do always re-iterate the "no eating" rule at the start of any water bead activity...


So here are a few of the things D has done with them over the last few months:

Sorting colours

Pretty simple but it kept D busy :) all you need is an assortment of colours all mixed up in a bowl and then make yourself comfy whilst your toddler spends the next 30 minutes separating out the colours!


Just squishing

If you've never felt waterbeads you won't understand how nice this is to do. They are soft and squidgy but not slimey - perfect for squishing :) and at the same time make sure you "bounce" them (but don't lose them!!).

Shaving foam and waterbeads

We sprayed foam onto a cheap baking sheet and then D arranged the beads to make patterns. Or just randomly dropped them wherever. Using tweezers he then tried to pick them all up again (this is pretty tricky and after a few minutes he got annoyed and used his fingers instead...) and put them in an ice cube tray.


Painting with waterbeads

A variation on marble painting this was great fun. Put a piece of paper in the bottom of a high-walled container (we used a roasting pan from Poundland) and dip some waterbeads in paint. Drop the beads onto the middle of the paper and swivel-swivel-swivel! Let dry and you have a waterbead masterpiece :)


Waterbead "soup"

Super simple but fun and also good manipulation/fine motor practice. We used a big tub with water, a smaller "bowl" for the soup, some silicone cupcake cases and a spoon to do the creating. D had fun scooping, swishing and putting groups of waterbeads in the cupcake cases.He happily played in here for over 20 minutes (at which point Iz woke up from her nap so the water beads got put away!).


Waterbead ice cubes

I froze some waterbeads in individual ice cubes (some were even turtle shaped but it ended up being pretty hard to tell that when frozen!). I then gave D a tub of yellow coloured water and all the ice cubes in a tray. He dropped them into the tub one by one, watched them melt, watered them with the watering can (Iz LOVED watching this in action!) and then caught all the pieces in a net at the end. This was the only waterbead activity listed here that Iz was present during and she was *very* heavily supervised, making sure she did not put any beads (or fragments of) anywhere near her mouth.


Frozen waterbeads 

I froze all the waterbeads that were left after we'd done all the above activities and saved them for a really hot day. Incredibly the British weather obliged a few weeks ago so out they came. First D swooshed them around the tray, then he tried to break them up with a spoon. Next a water gun came out, before a bottle of water.


Once they were all defrosting he spent ages transferring them from the box, onto the lid, and back into the box again. He loved trying to catch them on the spoon!


Note: once you have done this the waterbeads aren't reuseable again - once frozen and defrosted they become fractured and break up into smaller pieces.


******

And he obviously enjoyed the skittles and giant water bead water bed we'd previously made and played with too :)


******

Disclaimer: as with any activity involving your toddler/baby, use your own judgement and common sense. I always closely supervise any sensory play and always inspect items for wear/tear carefully before each playing session. Water beads are NOT safe if ingested. Always make sure you are confident with the safety of whatever your child is playing with.

Sunday, 28 June 2015

Shaving foam towers

When I saw this idea on Happy Hooligans blog I knew we had to try it. Such a simple set-up but perfect for D.


What do you need:
Foam blocks (think ours came from Toys'R'Us)
Shaving foam

First we saw how high we could build a tower just using the foam blocks. D could do about 4 or 5 before they toppled over (not helped as we were doing it in the garden and there kept being little gusts of wind!). Next I put some shaving foam in a shallow bowl, handed him a craft stick and then the challenge was to build a much taller "cemented" tower. 


To start with he only put small dabs of foam in the middle of the blocks but after I showed him how to spread it all the way across he had great fun being a builder.


He also learnt that as the tower got taller it was easier to spread cement on the new bit you were about to add, rather than on the tower. And we talked about choosing a wide base structure to give the tower extra stability - he's pretty good with sizing (thanks to those weird chocolate egg videos on YouTube!) so was easily about to pick out the biggest bits best for the job.


He could build much taller with the foam cement (and would've gone even higher if it hadn't been windy) and was even able to pick the towers up by the top - definitely can't do that with a regular tower!!


Afterwards I filled up a plastic tub with water and he washed all the blocks clean and laid them out to dry. He probably had as much fun doing that bit too! Love how toddlers enjoy nearly everything...


******

Have you done any building projects? Or twists on a normal game? I'd love to hear about them :)


Tuesday, 2 June 2015

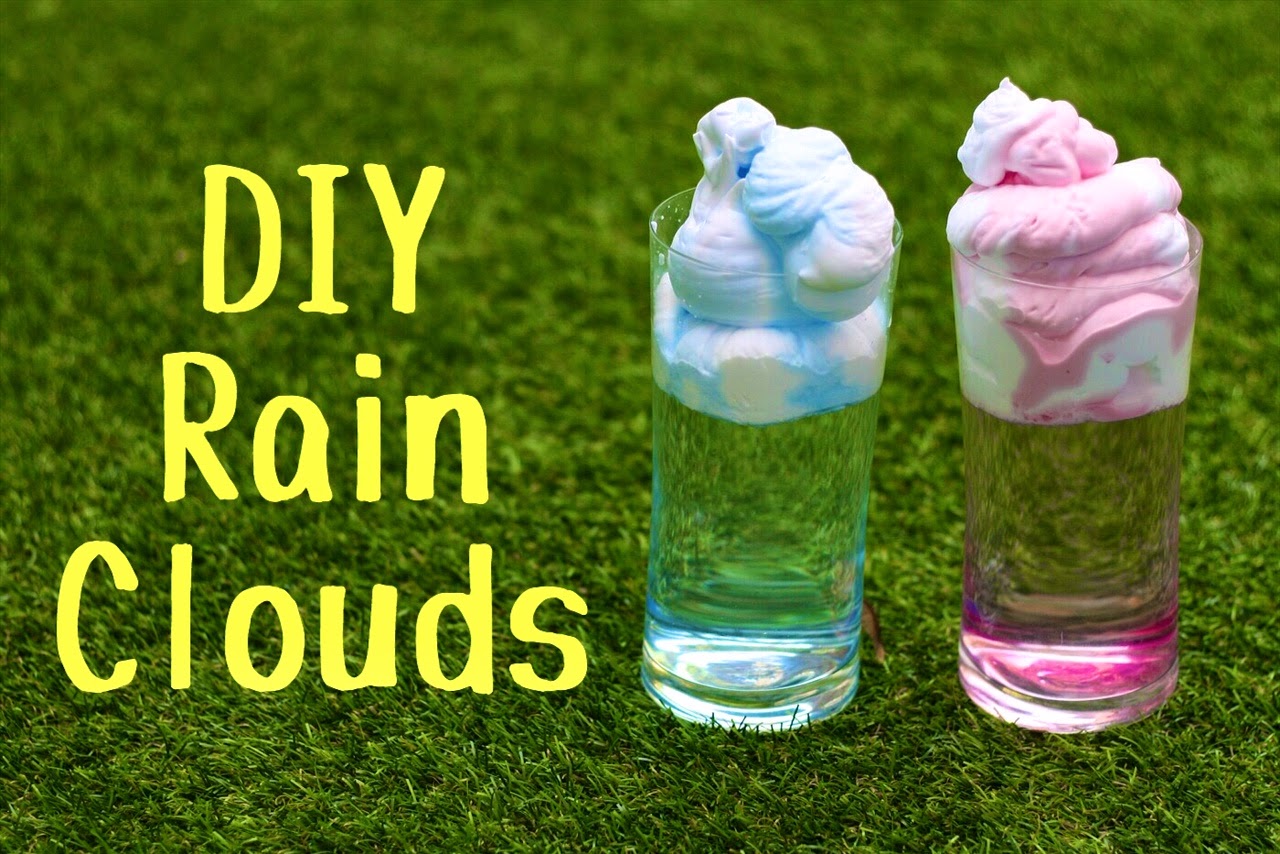
DIY rain clouds

When I saw these on Growing a Jeweled Rose blog I knew D would have so much fun with them. Shaving foam? Water? Pipetting colours? What's not to love? And in fact those are pretty much all his favourite things to do!


How pretty are these? I love his concentration and his exclamations of "ooooo" and "wow" as the colours started to seep through, and then very excited "it's raining!!". He definitely grasped the concept of the activity :)


The next time we made multi-coloured rain, using all the different watercolours (he'd just finished using them in his star painting for Toddler Book Club) - so pretty!


We did talk about rain coming from clouds but he's still a bit little for this to be much more than something cool to look at/do. But with older children you could definitely build more of a "learning" aspect into it, with where rain comes from, why it falls etc. 


******

And even better this activity leads perfectly onto making shaving foam pictures - you can just scoop the foam off the top and reuse it - perfect!

Have you done any cute weather-related crafts with your kids?


Thursday, 28 May 2015

Foam marbling

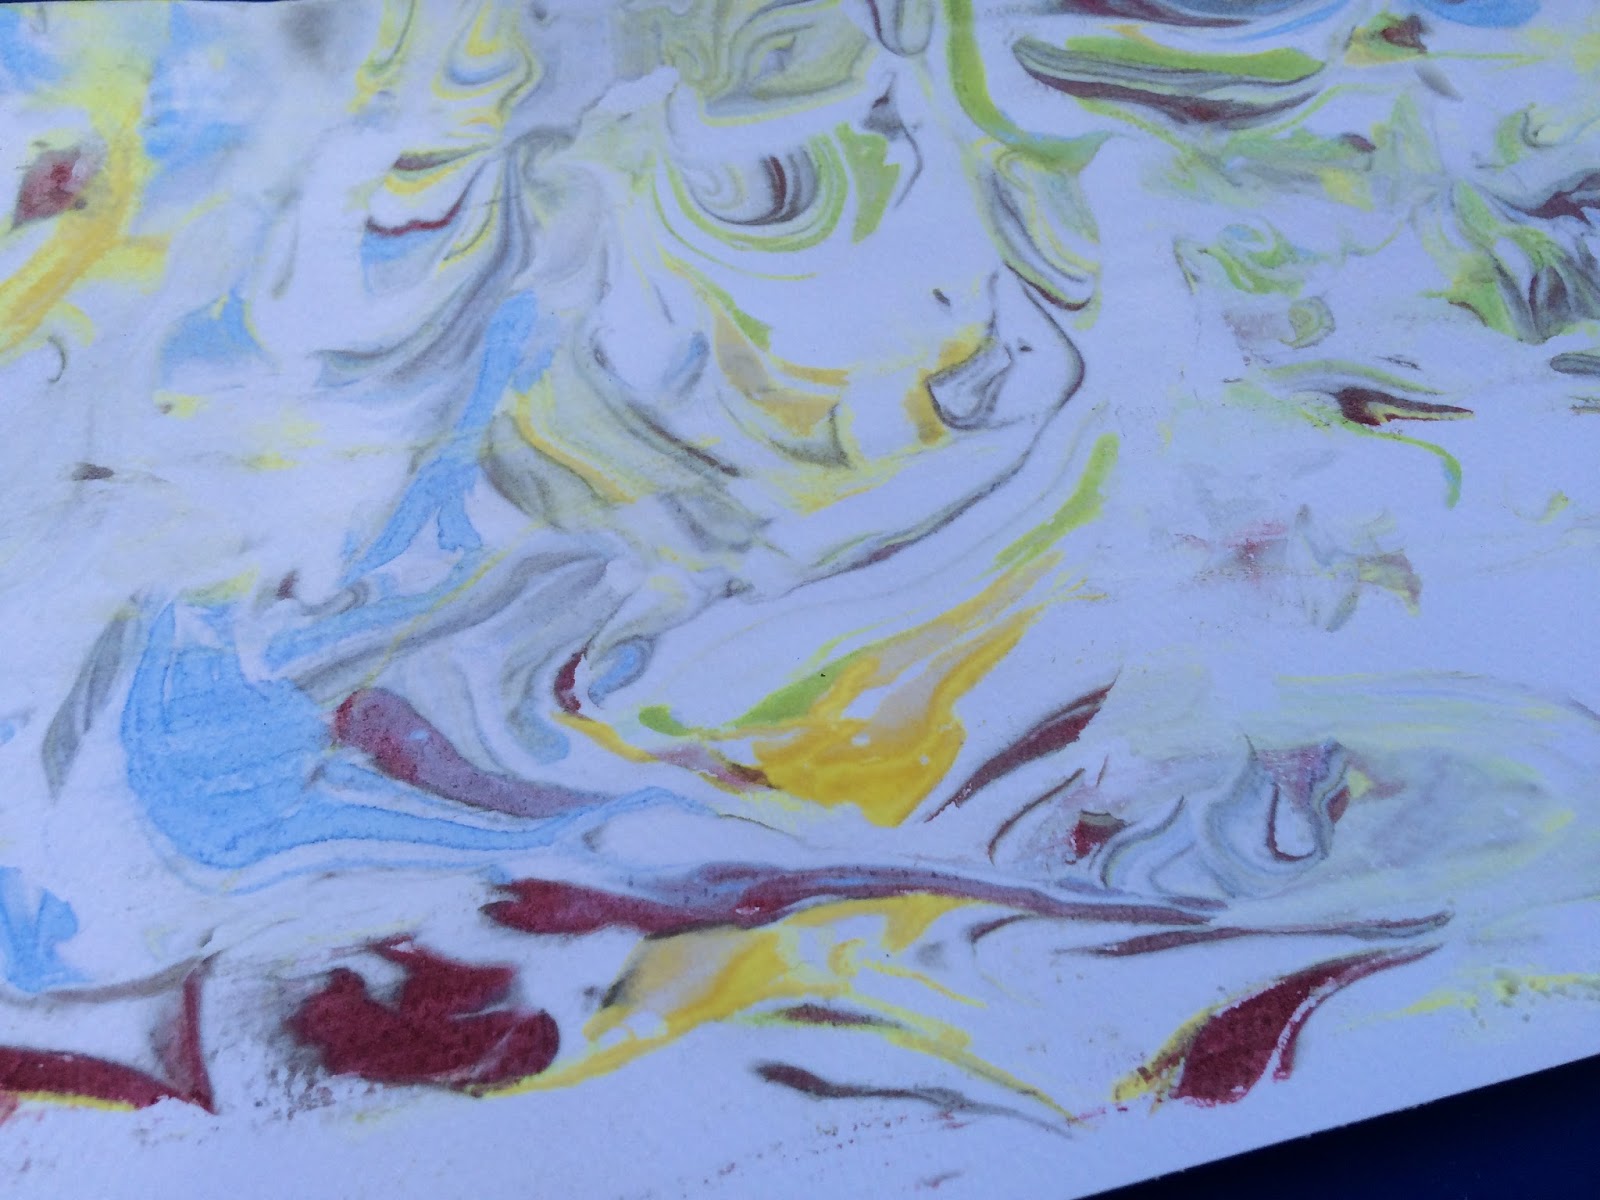
This is one of my most favourite activities to date - I love it!! And have even done a few pictures of my own after D is in bed ;)


Seriously, how pretty is that?!

So what do you need?
- shaving foam
- food colouring or liquid watercolours
- something to "swish" with (eg craft stick, spoon, finger)
- watercolour paper
- ruler or Squeezee 

How to do it:

Squeeze some foam out onto a flat surface (we did it inside one of our sensory bins) and roughly flatten it off. Add a few drops of different colours (D loves doing this bit)
 
Use your "swisher" to swirl the colours into the foam

Proudly show off your pattern

Even the scrapey-stick looks pretty!

Gently press your paper on top of the foam. Make sure all areas come into contact with the foam
 
Leave for one minute and then carefully lift the paper up (it will be covered in foam - don't worry!)


Using a ruler/Squeezee, expel all the foam off to one side - we used craft sticks but they were too small really. But you can see the cool pattern being exposed as we removed the foam above :) 

Admire your amazing masterpiece
Aren't they just so pretty?

Even just looking at foam is lovely...


Tips

Make sure the ruler (or whatever you're using to remove the foam) is larger than the piece of foamy paper. If you have to make 2 passes (or more) to clear the foam you will get extra streaky marks on your paper that aren't quite as pretty...

We personally found the colours obtained with the food colouring were much more vibrant than with the watercolours. It might be because the watercolours were more dilute (I'd make them more concentrated next time) but is something to bear in mind.

You can see the difference here - watercolour ones top left and food colouring ones bottom right
******

Afterwards we used the rainbow foam for small world play with some of D's animals - he gave them all a rainbow bath and then washed them all afterwards. It lent an extra 20 minutes of playtime to the pretty foam and was nice to use it for a couple of different things :)


******

These pictures would make lovely homemade cards or present tags - perfect for that next present for the grandparents.

Have you done marbling with shaving foam? I'd love to hear about it :)