Tuesday, 30 June 2015

What Iz loved - June 2015

Here is what Iz loved this month:


1. Baby jail
2. Chilling out in the paddling pool
4. Eating messily...
5. An early cake smash
6. Going for a row
7. Sharing swings

******


Sunday, 28 June 2015

What Iz loved - May 2015

This post is so hideously late... but at least I managed to write it before it became July!! Here is what Iz loved in May:


2. Starting nursery
3. Her new dress
4. Tunnels
5. Pulling to stand
6. Her giant duck
7. Playing peekaboo
 
******


Shaving foam towers

When I saw this idea on Happy Hooligans blog I knew we had to try it. Such a simple set-up but perfect for D.


What do you need:
Foam blocks (think ours came from Toys'R'Us)
Shaving foam

First we saw how high we could build a tower just using the foam blocks. D could do about 4 or 5 before they toppled over (not helped as we were doing it in the garden and there kept being little gusts of wind!). Next I put some shaving foam in a shallow bowl, handed him a craft stick and then the challenge was to build a much taller "cemented" tower. 


To start with he only put small dabs of foam in the middle of the blocks but after I showed him how to spread it all the way across he had great fun being a builder.


He also learnt that as the tower got taller it was easier to spread cement on the new bit you were about to add, rather than on the tower. And we talked about choosing a wide base structure to give the tower extra stability - he's pretty good with sizing (thanks to those weird chocolate egg videos on YouTube!) so was easily about to pick out the biggest bits best for the job.


He could build much taller with the foam cement (and would've gone even higher if it hadn't been windy) and was even able to pick the towers up by the top - definitely can't do that with a regular tower!!


Afterwards I filled up a plastic tub with water and he washed all the blocks clean and laid them out to dry. He probably had as much fun doing that bit too! Love how toddlers enjoy nearly everything...


******

Have you done any building projects? Or twists on a normal game? I'd love to hear about them :)


Thursday, 25 June 2015

Spin art t-shirts


After I read this blog post by The Jersey Momma I really wanted to try making some t-shirts of our own. D loves doing spin art (you can read about how to do the normal version here) and often wanders up to me clutching the salad spinner so I knew he'd be keen :)

We followed exactly the same approach as before except we used fabric paints. These were much more "solid" than the poster paints we've used before so took much more muscle to spin them out. D gave it a good try but I had to help with the spinning to generate enough "splatter". Because of this it was harder to generate as big patterns so instead we did one circle, waited for paint to dry on fabric and then the next day did another circle with different colours over the top :)


We also used stickers in a "resist-type" method, so their initials stayed white in amongst the colours. The sticker on D's one peeled off halfway through though but I just touched up the initial with white fabric paint afterwards. If you do use stickers I'd advise peeling them off while the paint is still wet - I waited about 20 minutes after making the imprint - as if you wait til it's dry there is a risk some paint might flake off as you peel the sticker away...


I love how they turned out :)


D helping take the pictures :)
Even though the fabric paints were slightly harder work it now means I can wash the t-shirt/babygro as much as I like and I know the pattern will stay firm. I might even make them into small cushions or bags once the kids have outgrown the clothes :)

******

Have you done any spin art? Or decorated your own t-shirts? I'd love to hear more ideas for us to try!


Tuesday, 23 June 2015

Edible bubble painting

Remember how you used to blow bubbles in your milk as a child? And probably got told off for doing it?! Well now you can encourage your little ones to do it, and make beautiful pictures at the same time :)


This is a super toddler-safe activity especially while they're learning how to blow consistently. You can also do it with bubble mix (post coming soon) and can make way more bubbles that way but it's not nearly as taste-safe if they accidentally suck!

What do you need?
-  Milk
-  Food colouring
-  Watercolour paper

What to do?
-  Pour some milk into small dishes or containers (I find ramekin dishes the perfect size).
-  Add a few drops of food colouring.
-  Give your child a straw and let them blow!

D really enjoyed just blowing bubbles to start with. He loved seeing different colours and watching how high the bubbles rose.


After a while we decided to make some pictures and tried a couple of different ways.

First D tried putting the paper on top of the dish of bubbles


Next I held the paper at about 80 degrees next to the dish whilst D blew bubbles. I think this method worked much better. The neon food colours were also much prettier than the regular food colourings we tried first.


D did this pic all by himself

I helped hold for this one - so pretty!

After we'd made some pictures D decided on the direction of play. I love it when he takes over the activity as I get to see his creativity :)

First he poured all the colours out one by one.


Then he tried to blow bubbles on the tray (unsuccessfully!).


How pretty is the waste product?!

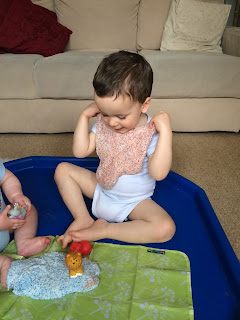
Meanwhile Iz was doing semaphore in baby jail...


Next D added paper towels and watched as the different colours seeped through and spread out.

And he quickly discovered he could make handprints.


All of these added a whole extra dimension to the activity that I hadn't even thought of - just love his imagination :)

Tips:
- use a thinner straw rather than the fat ones to get better bubbles
- neon food colouring gave much more vibrant colours than regular colours
- use watercolour paper as that will absorb some of the liquid and give nicer pics

******

We had so much fun with this very simple activity and definitely recommend it if you haven't tried it with your little ones. If you make any pictures I'd love to see them :)


Monday, 22 June 2015

Scribble art - a Father's Day craft

So I know I'm posting this after the event but Mr MFDS reads this blog so I couldn't post it beforehand!

Anyway so for this Father's Day D made a scribble plate. Mr MFDS loves cheese sandwiches so we thought a personalised plate was the perfect present.

D made some tape-resist decorations at Easter (read about them here) and we had the porcelain pens from our Elmer plate decorating (see here) so this combined the 2 perfectly :)

Step 1:
Put your stickers on your plate (or mug/bowl etc) in whatever pattern you want. We used some vinyl alphabet stickers to spell out "Daddy" but you could also use masking tape or regular stickers cut into the required shapes.

Step 2:
Let your toddler doodle (aka scribble) on the plate. Because we were using lots of colours D did one colour at a time - so he did one colour on one day and then we let the plate dry for 24 hours before adding the next colour


Step 3:
Slowly add more colours and encourage your toddler to make sure the area around all the stickers is well coloured in


Step 4:
Once the plate is coloured to everyone's satisfaction leave it to fully dry before removing the stickers. I found the easiest way was to pick along each edge of the sticker and slowly work towards the middle - but do whatever method works best for you, taking care not to pull any adjacent paint off with the stickers. 


Step 5:
Keep going until all the stickers are removed and you're left with your final design.


Step 6:
Bake in the oven as directed to "set" the paint

And there you go - a plate lovingly personalised by your toddler, that is dishwasher-safe :)

******

Did you do any crafts for Father's Day? I'd love to hear about them or if you try any tape-resist or scribble art :)


[note - there seems to be some confusion on Google as to whether you can eat off plates decorated like this or not. Some say yes, some say no. I'd say just pop a piece of paper towel or napkin over the plate to rest your food on and then you're sorted :)]

Thursday, 18 June 2015

(More) Taste-safe slime


So a few months ago we made edible slime (see here) and although D enjoyed playing with it, after 24 hours it wasn't as stretchy and didn't feel as nice to touch. To be honest I was also a bit wary of Iz taking a massive mouthful and then me having to clean up humongous poops for the next week... 

So when I found another edible slime recipe on FunAtHomeWithKids blog I had to try it. You can see the whole recipe and instructions here but I ended up having to tweak the amounts slightly. I'm not sure if it's because we don't use "cup" measurements in the UK and so I had to approximate, or whether cornflour is subtlely different to cornstarch? But anyway, here are the quantities I used:

30g seeds
1 box cornflour (250g)
350-400ml water

So I used more water than the original recipe said (I found with less water it was more like Oobleck and less like slime - this may be because I used slightly more cornflour during the oz-g conversion). I then made another load and coloured one red and one blue.

Stretchy red...

And stretchy blue...

Fun to squish hands into :)

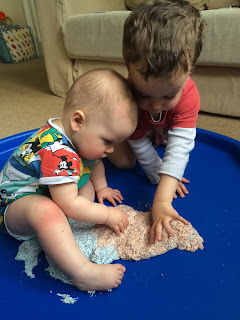
Even Iz enjoyed making handprint impressions!

Other tips/observations:
- you need a LOT of food colouring to make a difference
- if you want a marbled effect add the colouring to the dough, if you want a more uniform colour add it to the water 
- store it in a Tupperware in the fridge between plays (we kept ours for 7 days)
- "refresh" it with a tablespoon of water at each play if it feels like it's dried slightly. Knead the water into the slime and it then regains some of its stretchiness (but we always found it to be most stretchy on the first day)

Transferring it between containers is always fun

Iz could also stretch it

This slime actually felt quite nice to handle, and oozed between your fingers. It wasn't too 'slimy' and comes off your hands pretty easily. 

Love watching them engrossed in the same activity :)

Fascinated by the slime

You can even make a slime beard!

And this is why it had to be taste-safe!!! Lol

This was on day 7. D sprayed a little water on it, kneeded it in and then got squidging :)


Next we're going to try the chia seed recipe :)

******
Disclaimer: as with any activity involving your baby, use your own judgement and common sense. I always closely supervise any sensory play and always inspect items for wear/tear carefully before each playing session. Always make sure you are confident with the safety of whatever your baby is playing with.